Finding the Mapleton Tramline today
At the time of writing, the amateur historian or railway enthusiast may still
locate many sections of the old roadbed, embankments and cuttings, particularly
on the escarpments below Mapleton and the Highworth Range. In fact, much of the
formation can still be discerned by those who know what to look for. Only
sections excavated or otherwise disturbed by later earthworks for housing,
farming or roads are lost. There were some sections, such as along Puddle's
(Windsor) Road, where very little formation was needed. Even so, in most of
these cases the route of the permanent way may still be detected, even though
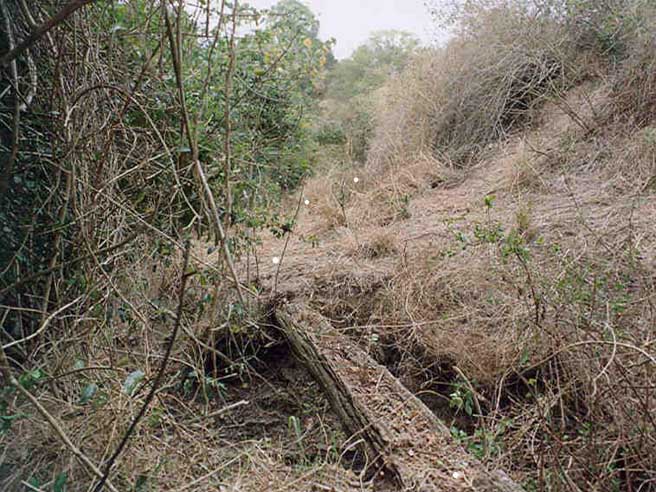
little evidence is apparent. Occasionally, wooden and steel sleepers may be found still in
position, and the occasional dog spike and length of rusted rail. A metal
detector will reveal numerous artefacts.
Some culverts remain, both concrete pipes and wooden box culverts, and some heavy timbers from bridges. Probably the best examples of the latter are the two bridges just east of Pope's Siding (about two hundred metres east of Willandra Court), which are still in a good state of preservation, and easily accessible from the Mapleton Road, though on private property. Remnants of the road bridge still exist nearby, where the road went through a
Z-bend to cross the South Maroochy River.To enable the reader to locate many of these remnants of the Mapleton Tramway, cadastral maps are included below. The maps are from the Department of Natural Resources and Mines of the Queensland State Government, and are Copyright The State of Queensland (Department of Natural Resources and Mines), 2005. The Department of Natural Resources and Mines gives no warranty in relation to the data (including accuracy, reliability, completeness or suitability) and accepts no liability (including without limitation, liability in negligence) for any loss, damage or costs (including consequential damage) relating to any use of the data.
To these maps have been added updated data (streets and housing allotments) by the Mapping Department of the Maroochy Shire Council. These additional data are Copyright Maroochy Shire Council, 2005. The Maroochy Shire Council gives no warranty in relation to the data (including accuracy, reliability, completeness or suitability) and accepts no liability (including without limitation, liability in negligence) for any loss, damage or costs (including consequential damage) relating to any use of the data.
User Licence No. USR:2005/979 has been given by officers of the Department of Natural Resources and Mines, and the Maroochy Shire Council, permitting use of the maps on this web site, provided that they are uneditable PDF (Portable Document Format) files. Adobe Reader or Adobe Acrobat Reader will be required to view them, and is available here.
The writer has superimposed on these maps a dotted line showing the route of the tramway and its branches, and highlighted this line in yellow to assist identification. The route as marked has an accuracy of better than five metres either side of the track centre line. This dotted line is Copyright John R. Henley, Nambour, 2005. Explanations of the maps are in blue type.
It is suggested that the blue map explanations be scrolled to the bottom of your screen. Then click on the MAP DESCRIPTION that you want. An Adobe Reader page will open in a second window, showing the map. Adjust the height of this second window so that the map explanation and the MAP ITSELF
can be seen together. This technique will assist you in deciphering the maps. The scale of the maps can be adjusted by altering the [ XX % ] number in the centre of the taskbar just above the image.As described previously, aerial photographs taken in 1940 have greatly assisted in fixing the position of the tramway on the cadastral maps. They show the line quite clearly as it then existed, four years before closure. These images were taken from a height of 12 700 feet (3871 metres) in overlapping east to west passes between 10:49 and 10:51 am on 8 July 1940, a Monday. Close inspection will show washing on the clothes lines in the Nambour backyards - Monday was washing day! Permission has been granted by Geoscience Australia, owner of the copyright on these photographs, for a selection of them to be used on this website.
All of the black and white aerial photographs accessible below are Copyright Commonwealth of Australia (Geoscience Australia), 1940. They appear in their own windows, so that comparison between them and the cadastral maps can be facilitated.
Moving your mouse pointer across the lower right-hand corner of an image will activate a control button which will enable you to enlarge or reduce the size of the image.
Recent satellite images of parts of the route are also provided in extra windows. These images are used with permission from
Space Imaging. Most were
taken in 2003, before the Mill was demolished. Since then, new estates and
buildings have obliterated many of the tramway earthworks at Burnside, Highworth,
Kureelpa and Mapleton. A line of white dots has been superimposed on the images to
indicate the tram route. Moving your mouse pointer across the lower right-hand corner of an image will activate a control button which
will enable you to enlarge or reduce the size of the image.
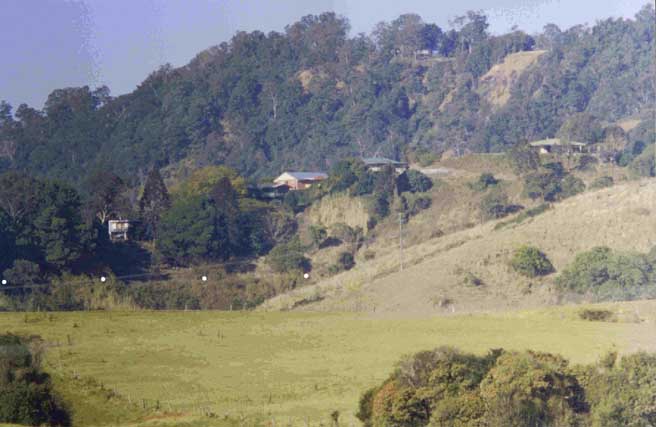
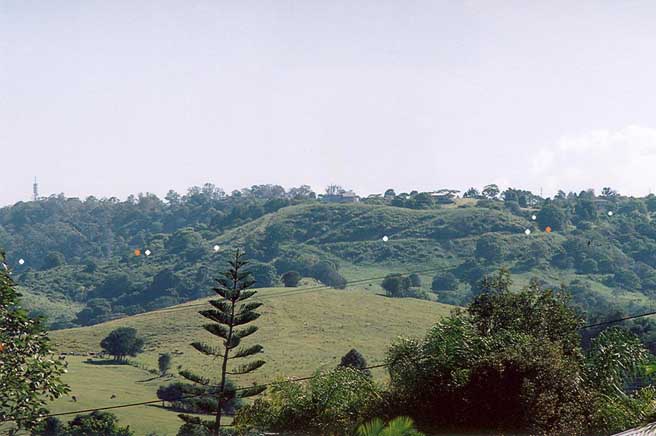
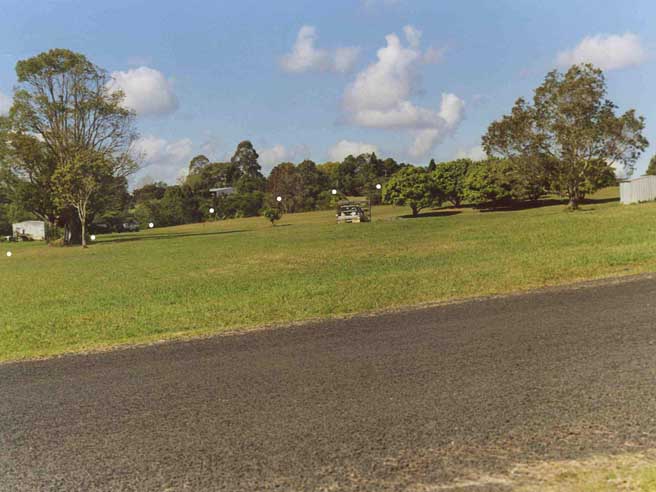
On the ground-level colour photographs taken by the writer, the tramway route is
indicated with white dots, if it is otherwise not readily apparent.
Google Earth
™ Guide:The reader may be familiar with the freeware program Google Earth™. This provides satellite images of most parts of the world for downloading. A Broadband connection is required. The images can be panned, tilted, scrolled, zoomed and saved. Recently the images of the Mapleton Tramway area have had their resolution improved, so that objects smaller than half a metre can be discerned. The date of the imagery appears to be early to mid-2007. Many parts of the tramway roadbed can be easily followed and examined from the comfort of your chair.
The Google Earth™ images include a mouse-controlled cursor, the latitude and longitude of which are shown at the bottom left of the image. To facilitate the location of Google Earth images, each of the photographs below includes the latitude and longitude of the site shown. To start with, locate Australia on the world globe, then Nambour Railway Station at latitude
26° 37' 31.80" South, longitude 152° 57' 27.44" East.Google Earth™ is available here for free.
_____________________________________________________
The
following description of the Mapleton Tramway route will be divided into the following sections:
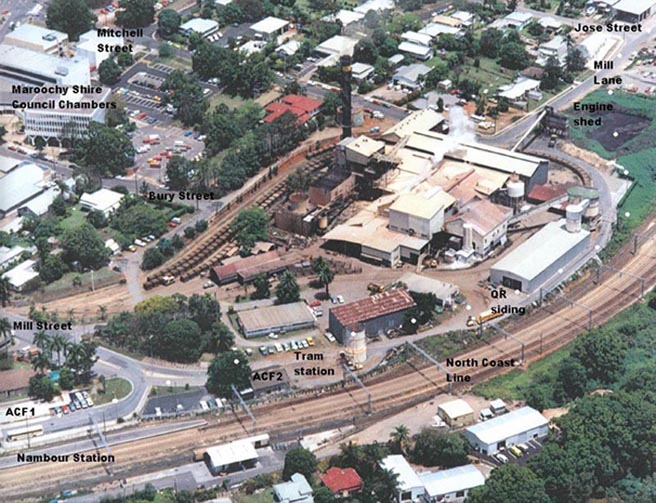
The Moreton Sugar Mill crushing in 2002. This was the site of the Mapleton Tramway's terminus and station in Nambour, adjoining the QR's railway station. Dots indicate the old tram route. The Mill was demolished, the tramway network torn up and the site levelled in 2004.
Key:
ACF1
= the concrete foundations remaining from the ACF-Shirley's fertiliser depot
at the tramway terminus. Numerous pictures exist of locomotives and carriages
waiting at this point.
ACF2
= a later ACF-Shirley's depot, demolished in 2004 and replaced by a fenced car
park.
QR siding = a spur running from the QR into the Mill site. Not operational
towards the end, but the junction with the QR is still visible.
Engine shed = a small open engine shed was located here on a short spur
running off the tram line.
1. The Nambour lines near the Station and the Mill
1940 AERIAL PHOTOGRAPH OF
THE NAMBOUR TOWN CENTRE
MAP OF THE LINE
FROM NAMBOUR STATION TO THE EASTERN END OF WINDSOR ROAD
1940 AERIAL PHOTOGRAPH CLOSE-UP, CENTRED
ON THE MORETON CENTRAL SUGAR MILL
The
Mapleton Tramway owned no buildings of any kind in Nambour, but there were a
fruit shed and two buildings owned by the ACF-Shirley's Fertiliser Company.
All three buildings were built next to the tramtrack, with platforms for
loading and unloading goods. These buildings were located near the western end
of Mill Street, where a traffic island is found today. Some concrete
foundations exist nearby, which may be the remains of the fertiliser
company's buildings. On the other hand, there was a similar fertiliser
building located about 50 metres to the south, which may be one of the
buildings shown in the old photographs. This had not been proven definitely
before the building was demolished in 2004. The site is now a small enclosed
car park. The platform where the tramway was raised above a parallel QR spur
to facilitate transhipment of goods from the tram to QR wagons and vans was
located at the western end of Mill Street, south of the Nambour Station
platform.
From the Station, the tramway headed south, converging slightly towards the QR North Coast Line. It crossed a QR siding leading into the sugar mill and continued south between the mill and the QR main line. A culvert where this QR siding crossed from the QR right-of-way into the Moreton Mill grounds still exists at the boundary.
As the Mapleton Tramway approached the western end of Mitchell Street, it swung left in a gentle curve and headed downhill towards the intersection of Mill Lane and Jose Street. A present-day small deviation in the roadway of Mill Lane at its intersection with Jose Street is due to the tramway alignment at that point, Mill Lane not joining Arundell Avenue until after this part of the tramway was lifted in 1971. This deviation is indicated by an angled bend in the footpath and kerbing on the northern-eastern corner of these two streets.
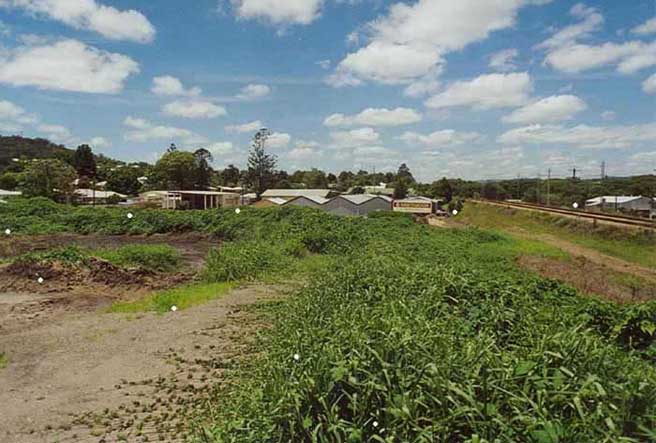
Photo 1: Looking south from the tramway route, 50 metres west of the corner of Mill Lane and Mitchell Street.
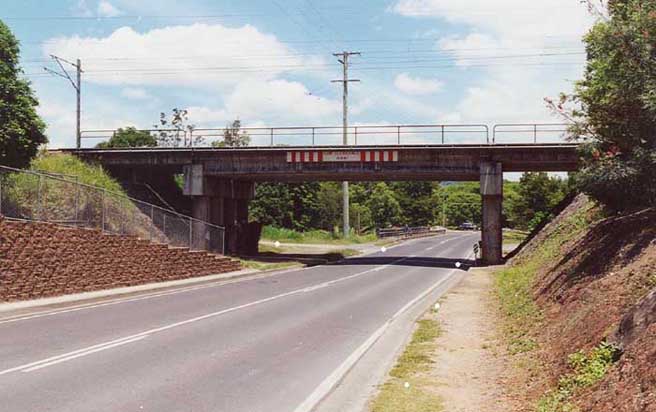
The line then swung to the right, heading for the underpass where Arundell Avenue passes beneath the QR. It ran alongside the avenue and beneath the railway bridge for about 50 metres on its northern side, but then swung sharply left to cross the avenue. A gravel road now exists at this point, the entrance being seen below the left hand side of the bridge in the picture below. A set of points facing Mapleton was located here, and led to a siding which ran north up what is now Colless Lane to a sawmill which still stands. The entrance to this lane is visible just beyond the right-hand bridge pier in the picture below.
The spur continued past the sawmill to a deadend or head shunt at a point near the
southern end of today's Price Street. Well before the deadend there was a
set of points, trailing to a tram heading north. The track from these points
headed south, then swung to the right through a wide semicircle until it was
heading north again. The line then immediately swung left through ninety
degrees until it was heading almost due west, and crossed Petrie Creek on a
high bridge. It then entered the cane fields where the Sundale Retirement
Village now stands, and terminated near Doolan Street. No evidence of this
line remains, but the sawn-off stump of one pier of the bridge still stands on the western bank of
the creek, 200 paces along the concrete walking path which runs downstream
along Petrie Creek's west bank from Carter Road. Within a few metres, both
earthen abutments of the bridge are still visible.
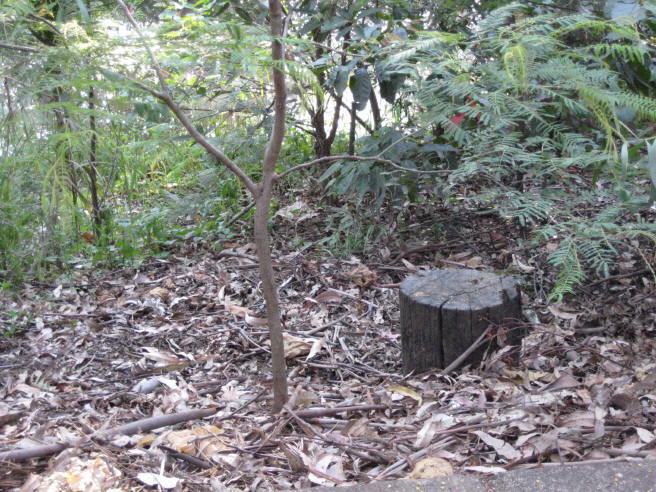
Photo 2a: The sawn-off stump of the bridge pier. Petrie Creek is in the background.
2.
The main line from Arundell Avenue in Nambour to Highworth
MAP OF THE LINE FROM ARUNDELL AVENUE ALONG WINDSOR ROAD, WITH THE BRANCH TO PERWILLOWEN
Explanation of Map from right to left: At the centre right margin, the route from Nambour Station passes under the Arundell Avenue QR railway bridge. It crosses Petrie Creek and passes around two sides of the house once owned by a Mr Jakat. The line then crosses Perwillowen Road and runs west along Windsor Road to a point near the entrance to the Cooloola Sunshine Institute of Technical and Further Education (CSIT). At this point the Perwillowen Branch turns off, heading south-west to cross Whalley Creek, and then continues in a more-or-less westerly direction. The main line follows Windsor Road as it climbs towards Highworth.
1940 AERIAL PHOTOGRAPH OF THE AREA SHOWN IN THE MAP ABOVE
(image
1940 AERIAL PHOTOGRAPH CLOSE-UP, CENTRED ON THE PETRIE CREEK BRIDGE AND
JAKAT'S HOUSE
From the Arundell Avenue underpass, the route heads south for a short distance as described above. The line then swings to the south-west along a low embankment leading to a bridge over Petrie Creek. This embankment is best seen from the footpath on the south side of the road bridge where Arundell Avenue crosses Petrie Creek. The tramway bridge, a substantial timber structure of four spans, was demolished in 1971.
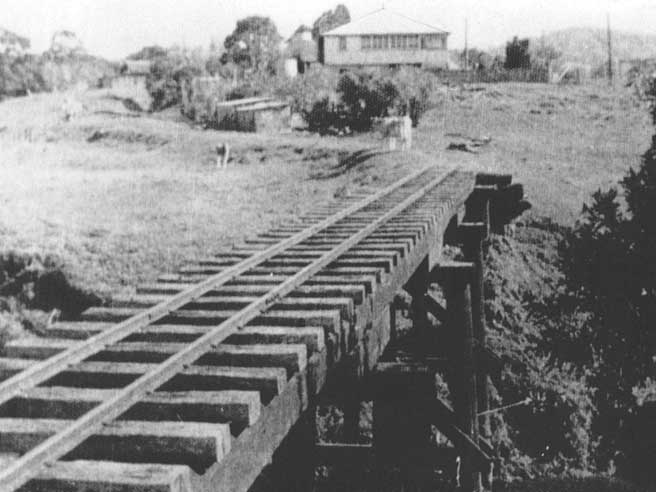
Photo 3: The bridge over Petrie Creek looking south-west, with Jakat's house beyond. (Latitude 26° 37' 53.74" S, longitude 152° 57' 18.01" E).
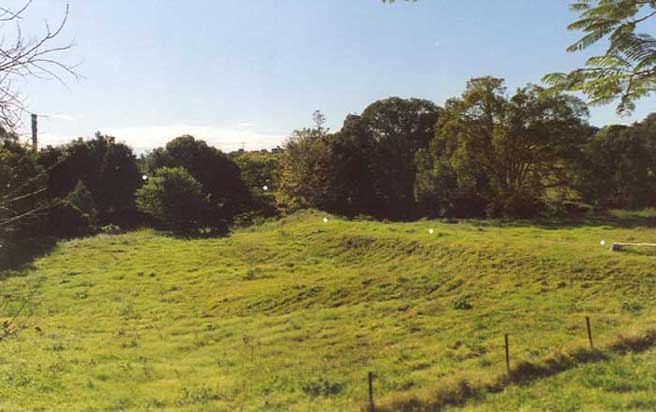
Photo 4:
The
embankment on the western approaches to the bridge over Petrie Creek
(demolished in 1971).
Heading south for a short distance, it then curves round to the right, to skirt Jakat's house on its eastern and southern sides. Mr
Jakat lived here in the 1930s, and his house is still much the same as it was then.
Photo 5: Mr Jakat's house in 2002. (latitude 26° 37' 55.34" S, longitude 152° 57' 14.52" E).
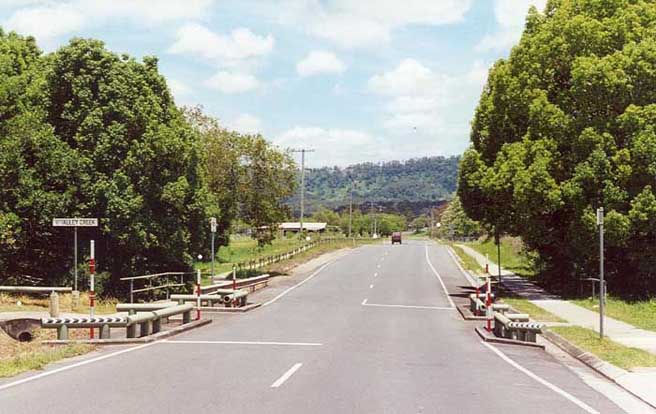
Photo 6: The roundabout at the junction of Perwillowen Road at left, and Windsor (Puddle's) Road running off to the right. (Latitude 26° 37' 55.94" S, longitude 152° 57' 12.00" E).
The route then follows Windsor Road on its southern side, heading west. The roadbed as far as Whalley Creek is obliterated, and there is no sign of the low bridge over that creek.
No earthworks were needed from this point as far as the foot of the climb to Highworth, as the land is flat and almost level. Behind the Nambour Special School and Gospel Church, two bridges over Whalley Creek have been made with rails by persons unknown. Some of the rails are cast iron and dated in the 1870s, so they were purchased second-hand before being used on the tramway. The date when they were salvaged from the tramway is unknown. Sometimes they are clearly visible, at other times covered with flood debris. Some sections of portable track and other rails can be found lying in the undergrowth nearby.
Opposite the entrance to the Cooloola Sunshine Institute of Technical and Further Education (CSIT), there was a loop where trams could cross. Rakes of cane trucks could be temporarily stored there before being taken to the Mill. At this point there was a junction. The main line to Mapleton goes straight ahead, but soon curves to the right as it begins the climb up to Highworth. Windsor Road follows the route exactly until near its end. The branch to Perwillowen turns left and heads south-west through the Rotary Garden Village towards a second crossing of Whalley Creek.
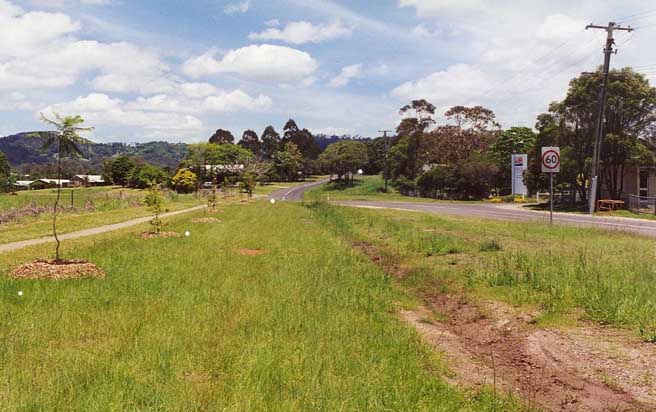
Photo 9: The site of the junction with the Perwillowen branch, looking west, at the start of the climb to Highworth. (Latitude 26° 37' 58.95" S, longitude 152° 56' 40.06" E).
Trams heading
up the Perwillowen branch took the left hand route at the junction. They
headed south-west, and crossed Whalley Creek before heading generally west.
The remains of this bridge, including a length of rail and a
concrete-reinforced abutment, can be seen about thirty metres due south of the
Rotary Garden Village's croquet lawn. The route of this branch to
its terminus is
covered in Section 9.
1940 AERIAL PHOTOGRAPH SHOWING THE ROUTE FROM THE MILL THROUGH BURNSIDE, THE
JUNCTION TO PERWILLOWEN< AND THE START OF THE CLIMB UP WINDSOR ROAD TOWARDS
HIGHWORTH
1940 AERIAL PHOTOGRAPH CLOSE-UP, SHOWING A TRAM JUST EAST OF THE JUNCTION TO
PERWILLOWEN
(image
Returning to the main line, it curves right and begins to climb along the crest of a
rising ridge, with the land falling away on either side. Puddle's house, an old Queenslander, is passed on the right.
MAP OF THE CLIMB UP WINDSOR ROAD FROM THE ROTARY GARDEN VILLAGE TO HIGHWORTH
Explanation of Map from right to left: At the lower right is the junction between the Perwillowen Branch and the main line, near the entrance of today's Rotary Garden Village. The main line follows Windsor Road upgrade, along the crest of a spur. Soon after crossing (North) Henebery Road there is a trailing junction to the Image Flat Branch. The Mapleton Tramline follows the Nambour-Mapleton Road on its southern side, in a short level section.
1940 AERIAL PHOTOGRAPH SHOWING THE ROUTE FROM PERWILLOWEN JUNCTION UP THE
FIRST STAGE OF THE HIGHWORTH RANGE ASCENT, TO THE MAPLETON ROAD LEVEL CROSSING
1940 AERIAL PHOTOGRAPH CLOSE-UP OF THE ROUTE, CENTRED ON THE HIGHWORTH LOOP AND
JUNCTION TO IMAGE FLAT
1940 AERIAL PHOTOGRAPH CLOSE-UP, CENTRED ON THE DEEP CUTTING BELIEVED TO BE THE
40 FEET DEEP ONE
2010 SATELLITE PHOTOGRAPH CLOSE-UP, SHOWING THE SITE OF THE DEEP CUTTING AS IT
APPEARS TODAY
Photo 12: Heading up Windsor Road. This road was bitumenised in 2003. The formation where the tramway route winds along a spur of the Highworth Range on its way to Doig's Point can be seen on the horizon. (Latitude 26° 37' 41.19" S, longitude 152° 56' 09.72" E).
The northern part of Windsor Road deviates to the right from the tram route. Roadworks in 2004 buried part of a cutting in this area, but most of it was untouched, with some wooden sleepers still in position. By 2013 debris from the undergrowth had buried the sleepers shown below, but they are probably still there, awaiting rediscovery.
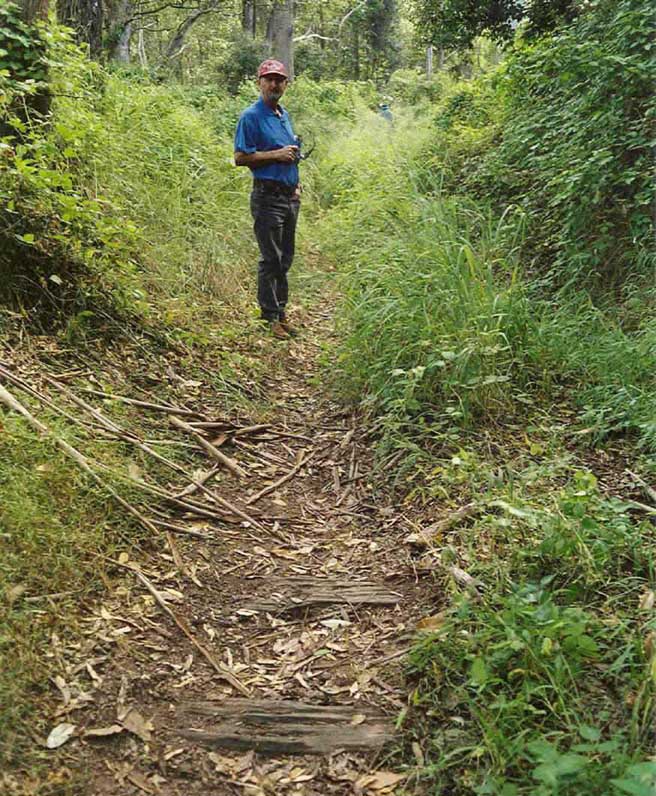
Photo 13: Sleepers still in position on the roadbed at the discontinuity in
Windsor Road. This section was partially covered by soil during adjacent roadworks in 2003.
(Latitude 26° 37' 32.86" S, longitude 152° 55' 58.54" E).
The tram route swings left and crosses a gully to head almost due west. A farmer's dam is almost on the formation. The route at this point is heading towards a low hill which is too steep to climb. This is where the 40 feet deep curved cutting was located. The original surveyor, Henry Pope, proposed a tunnel for this section, but the contractor claimed it "would not stand" and the cutting was used instead.
This long cutting crossed a large paddock and headed for the junction of Henebury Road and Mapleton Road. After the Mapleton Tramway was closed and the tracks lifted, the cutting was completely filled in as it divided the paddock in two. This paddock ran south from the road junction, its northern boundary being a high electricity transmission pylon carrying the Palmwoods-Traveston high-tension power lines.
Photo 14: The site of the 40 feet deep cutting in 2007, now filled in and almost obliterated. In this view looking downhill to the south-east, the cutting accommodated the turn to the left in the middle distance. (Latitude 26° 37' 14.02" S, longitude 152° 55' 45.00" E).
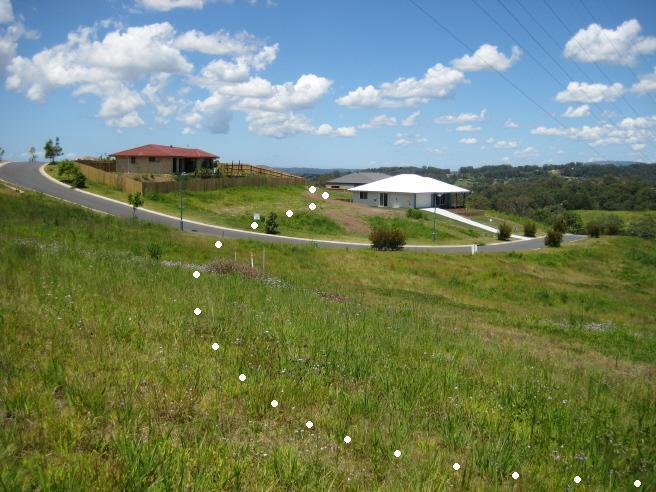
Photo 14a: The site of the 40 feet deep cutting, being developed as a housing estate in 2010. The north-western (uphill) end of the cutting began near the road, and swung to the left in the middle distance, its deepest section lying between the furthest new houses. (Latitude 26° 37' 13.00" S, longitude 152° 55' 46.00" E).
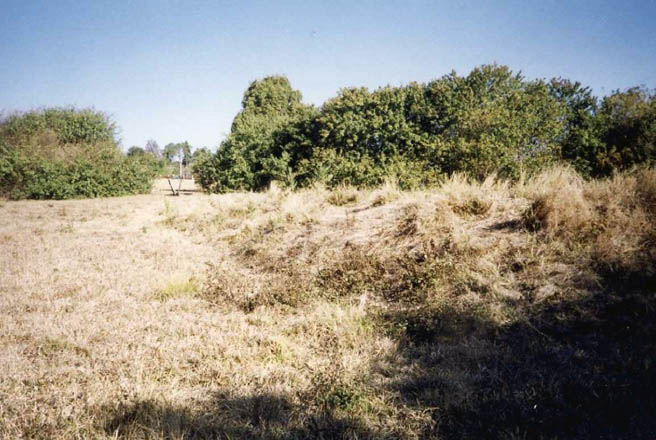
The only remnant of the deep cutting (apart from a slight discontinuity in the paddock's slope) was at the paddock's eastern boundary, where a section between one and two metres deep was not completely filled in, the banks still being visible. This remnant was adjacent to the farmer's dam to which we previously referred.
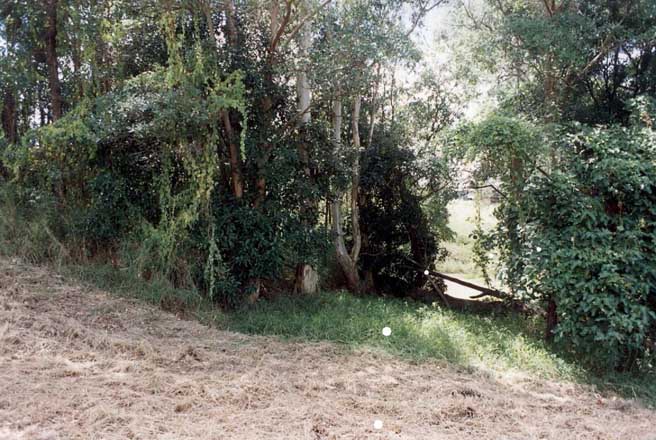
Photo 14b: The eastern remnant of the 40 feet deep cutting in 2007, with the farmer's dam visible behind the trees in the background. (Latitude 26° 37' 18.45" S, longitude 152° 55' 49.93" E).
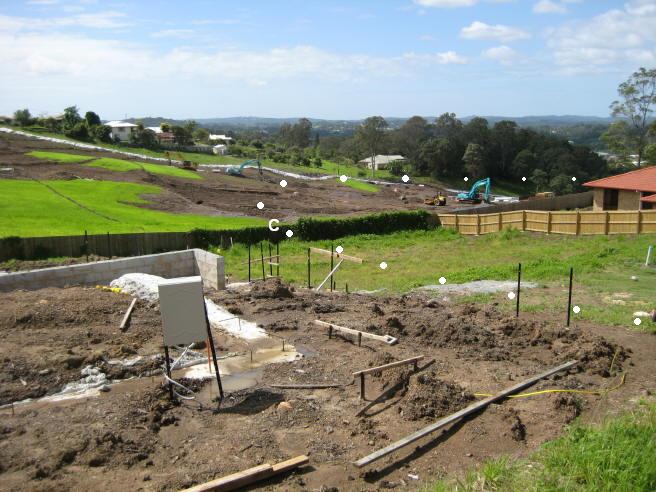
Photo 15: The same area is almost unrecognisable in 2010. The south-eastern (downhill) end of the cutting began near the point
C and deepened as it approached the right margin.
Photo 15a: The same area in December 2013, now completed and being built upon. The
half-hidden road crossing the picture diagonally has been named 'Tramline Rise'.
Note the concreted area on its far side near the right margin.
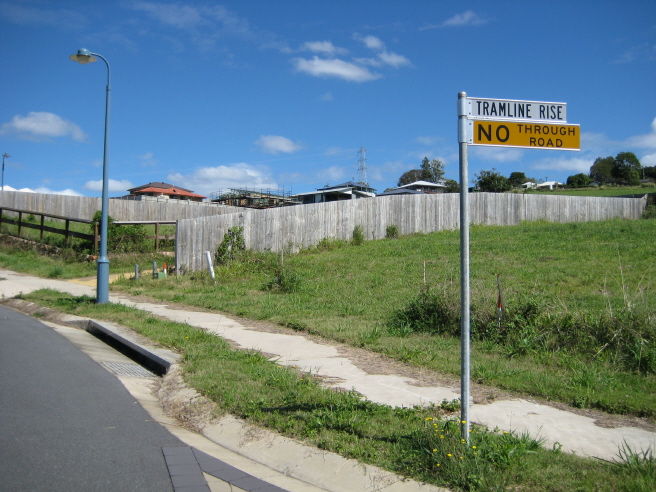
Photo 15b: The entrance to 'Tramline Rise' which runs uphill to the right.
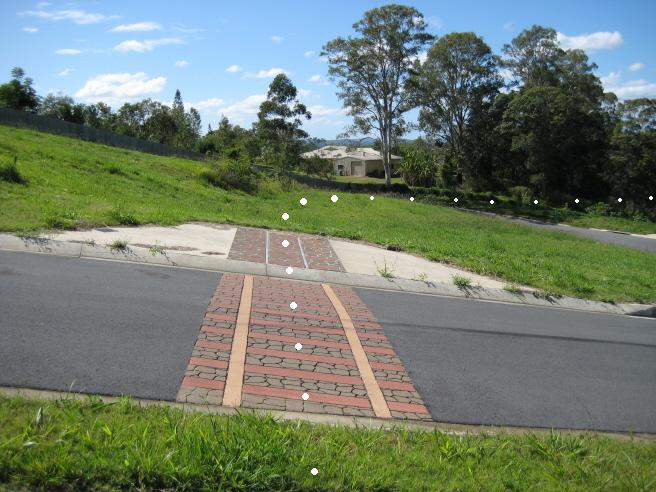
Photo 15c: Tramline Rise, with the concreted area shown in Photo 15a, looking south-east towards Windsor Road.
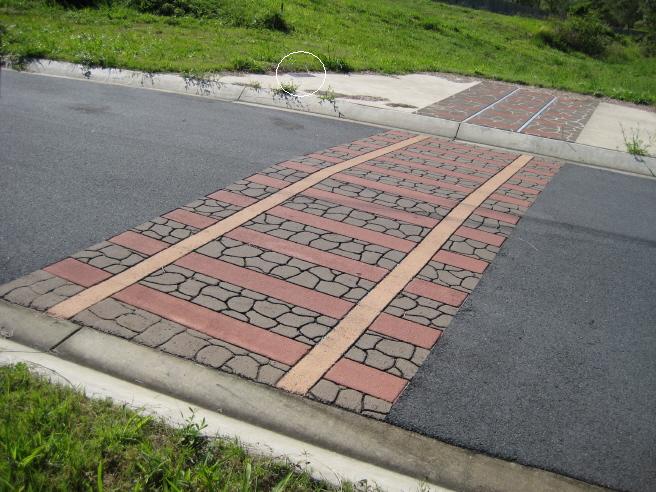
Photo 15d: The old tram route is marked for posterity. The origin and accuracy of the marking are unknown at this stage, but it appears to be in the correct area.
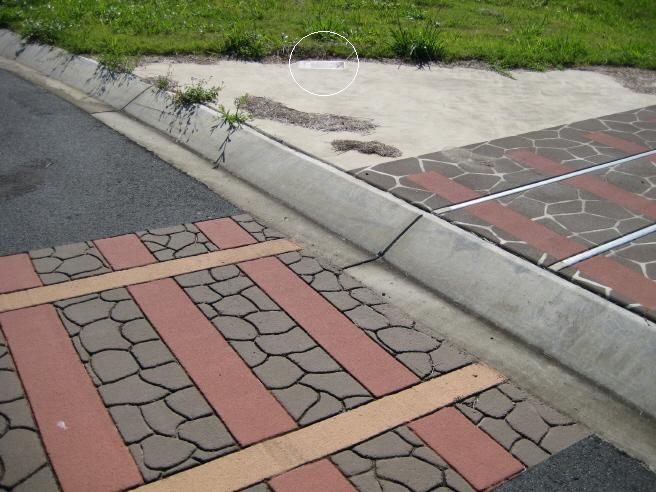
Photo 15e: A brass plaque is mounted in the concreted area.
Photo 15f: The plaque. Unfortunately, the wording is somewhat inexact and in places incorrect or misleading. The writer suggests the following amendments:
Nambour
to Mapleton Historic Tramline
The Moreton Mill gifts the locomotive '
Sunshine
Coast Regional Council Nambour & District Historical Museum
1897 - 1905:
The
Moreton Central Sugar Mill constructs a 2-feet gauge tramline to the districts of Kureelpa and Dulong for transport of sugar cane to the Mill
in Nambour.
1908:
A 'Shay' geared locomotive named 'Dulong'
replaces horses and gravity for the operation of the tramline. This
specialised type of locomotive is necessary as the line is very steep with
curves as sharp as 58-feet radius.
1914 - 1915:
The
Maroochy Shire Council purchases the tramline and rolling stock and
extends it from Kureelpa to the village of Mapleton. A second Shay
locomotive is purchased by the Council to enable a daily service to be
run carrying passengers, mail, livestock, cream, logs and general goods.
It is named 'Mapleton'.
1916 - 1944:
'Dulong'
runs the sugar cane service during the crushing season, and 'Mapleton'
runs the passenger and freight service six days per week all year. Both
locomotives are used when weekend specials for tourists are organised.
1945:
The
Maroochy Shire Council closes the line, the rails are lifted and a
40-feet deep cutting just to the west of this point is filled in. All
track, the two Shays and rolling stock are sold to the Moreton Mill for
use on its cane tramway network.
1948:
The
'Dulong'
locomotive is cannibalised to provide parts for the 'Mapleton',
which is renamed 'Shay'
in 1958. It continues to work for the Moreton Mill until set aside circa
1960.
1985:
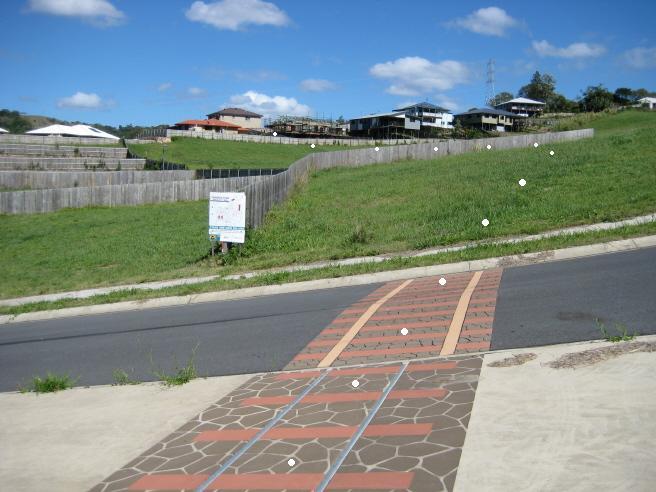
Photo 15g: Looking uphill from the plaque (north-west) to the site if the 40-feet deep cutting, which cut through the spur in the centre of the picture, below the skyline. Note the white developer's sign.
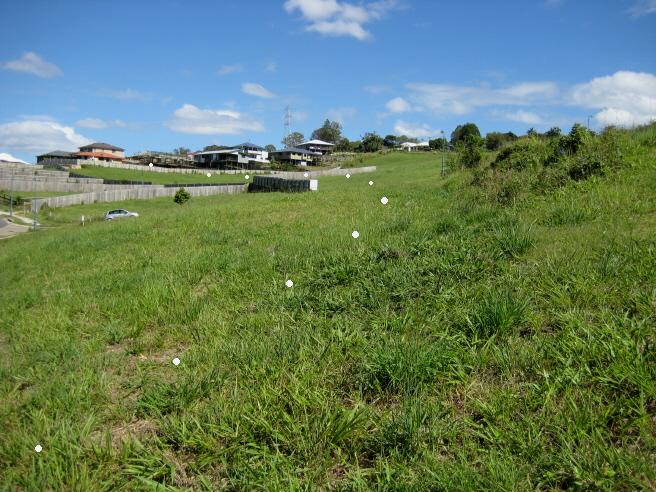
Photo 15h: The view from some earthworks, 100 metres downhill from the plaque. The white sign is visible in the centre of the picture. If the marking on the road is in the correct position, and the earthworks predate the construction of the estate, then it is possible that they were part of the tramway right-of-way.

Photo 15i: The beginning of the 40-feet deep cutting.
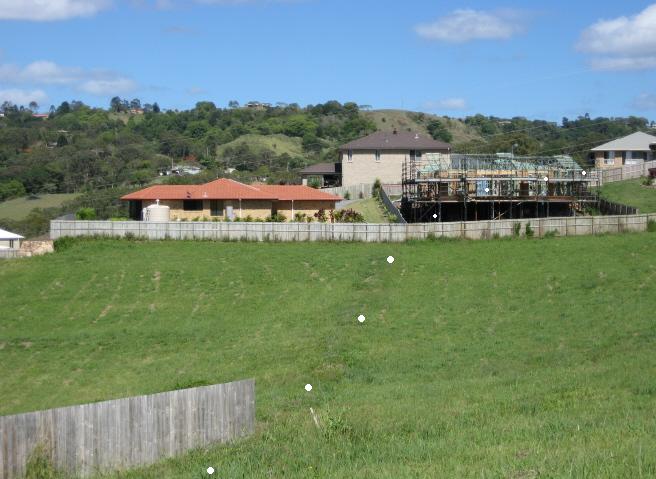
Photo 15j: The site of the 40-feet deep cutting.
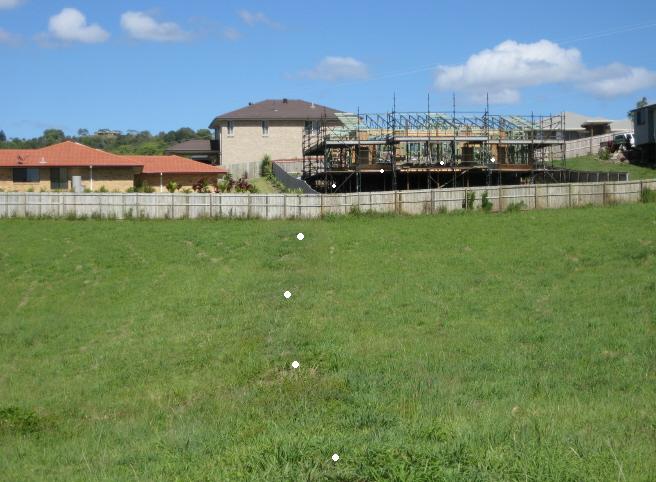
Photo 15k: The site of the 40-feet deep cutting.
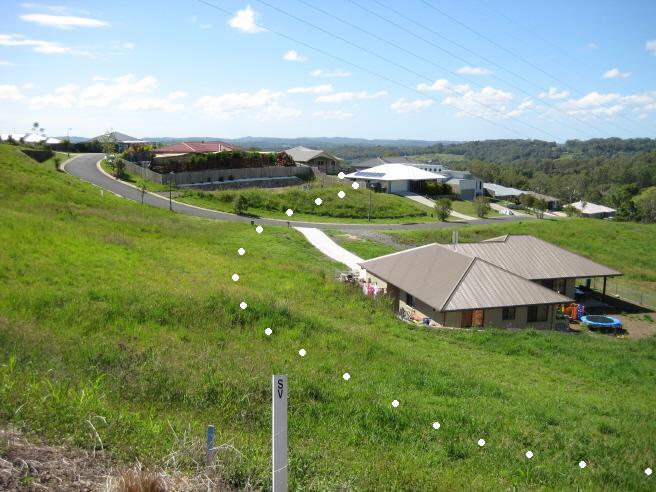
Photo 15l: The site of the 40-feet deep cutting is in the centre of the picture, in the middle distance. In this view looking downhill (south-east, towards Nambour), the cutting ended near where the tramline crossed the road, and continued the climb towards the Henebery Road crossing, and the Highworth junction to Image Flat. Compare this image with Photos 14 and 14a.
The
route now crosses North Henebery Road heading
north-west, and a house has been built on the formation at this point. This spot, known as Highworth, had a trailing junction which led to the Image
Flat branch, which will be described in Section 10.
3.
The main line from Highworth up the first range to Kureelpa Falls Road
MAP OF THE CLIMB FROM HIGHWORTH, ROUND THE HORSESHOE CURVE AND ALONG THE RANGE
Explanation of Map from right to left: At t
1940 AERIAL PHOTOGRAPH OF THE AREA COVERED IN THE ABOVE MAP
1940 AERIAL PHOTOGRAPH CLOSE-UP, FROM THE MAPLETON ROAD CROSSING UP THE
HIGHWORTH RANGE
After crossing North Henebery Road, the route then approaches Mapleton Road, and follows it quite closely on its south side (only ten metres or so from the road fence) until it crosses the Mapleton Road at a bend formerly known as 'Captain's Corner'. A large pond and a tennis court are on the left. An unprotected level crossing was located here. The house at the corner sits squarely on the old tram roadbed, partially in a cutting which can be observed behind the house.

Photo 16: The site of the first level crossing on the Mapleton Road, at the former 'Captain's
Corner'.
(Latitude 26° 37' 14.15" S, longitude 152° 55' 18.92" E).
Behind the house at Captain's Corner, the line was carried on a shelf cut into the northern slopes of a hill. The Nambour-Mapleton Road is built along the southern slopes of the same hill, and both road and tramway come together again at the site of the horseshoe curve. Murtagh's residence was between the two, on the top of this hill, at what is now No. 346, Mapleton Road.
The tramway uphill from Captain's Corner runs along the southern boundary of a cattle property, climbing along its shelf with an uphill slope to the south and a steep slope to a creek below to the north. This creek, known variously as Perry Creek or Rocky Creek, has its source above the horseshoe curve, and runs from there just below tramway level, passing under the horseshoe bridge and two other tramway bridges. Soon its slope increases sharply so that it drops to about 10 metres below the track. The creek then passes over a 10 metre high waterfall and turns sharply east into a short but precipitous gorge, until its valley opens out above Captain's Corner. To the left of the climbing tramway are the back fences of 14 housing allotments which occupy the whole of the hill.
Persons wishing to follow the tram route in this Highworth section must first obtain permission from the genial owner of the cattle property on which the route is located. The tramway formation forms the southern and western boundary of the property, the fence line being on the left side of the formation, facing uphill.
As the tramway climbs, it bears slightly to the right, following the creek upstream which is about 20-25 metres below, in its gorge. The left bank is steep in places, and the tram formation is cut into these parts so that there is a wall to the left, three to five feet high. Some of these cuts are into solid basalt rock. The slope to the right descends dramatically into the gorge. When the tram route reaches a point about due north of the hill's summit, it suddenly swings sharply round through ninety degrees to the south, for the creek does the same. A 10 metre high waterfall here is spectacular after rain, and from now on the creek becomes closer in height to the tramway. This is the sharp bend overhanging the gorge that so frightened the reporters from the Queensland Agricultural Journal when they hurtled round it on a cane trolley in 1903. Even today it looks very dangerous, as a derailment here would likely precipitate the whole tram - locomotive, vans, wagons, kit and caboodle - down into the gorge, from which salvage would be almost impossible and rescue fraught with difficulty. About 100 metres south of the ninety-degree bend, the creek performs a sharp S-bend and turns south-east hard against the steep slope of the hill, leaving no room there for the tramway. The tram route therefore crosses to the opposite side of the creek and then back again over two single-span bridges, the first of which has a single rotted bearer still in position, and the second of which has disappeared completely, save for traces of the south-eastern abutment.
The
route now swings to the right (west) to enter a sharp bend which will turn the tram
around completely.
MAP OF THE CLIMB FROM HIGHWORTH UP TO DOIG'S POINT AND BEYOND
Explanation of Map from right to left:
The main line follows the Nambour-Mapleton Road on its southern side, then crosses that road at the site of a level crossing and follows the northern boundaries of some housing allotments. There is a steep drop to the creek just to the north. The tramline then turns south, crosses the creek and back again, and then swings round through 230 degrees in the famous Horseshoe Curve, crossing the creek a third time. The route then climbs north along the spurs of the Highworth Range. It climbs along a large spur, and swings to the left around this spur in a semicircle, to head south. The line then swings to the west, climbing along the contours of the land, until it passes under Kureelpa Falls Road in a deep cutting. This is Doig's point. The next mile of track runs downhill, 'Doig's Bank', heading almost north.
1940 AERIAL PHOTOGRAPH OF THE AREA COVERED IN THE ABOVE MAP
1940 AERIAL PHOTOGRAPH CLOSE-UP OF THE CLIMB FROM HIGHWORTH TO KUREELPA FALLS
ROAD
1940 AERIAL PHOTOGRAPH CLOSE-UP , FROM THE MAPLETON ROAD LEVEL CROSSING HALF-WAY
UP THE HIGHWORTH RANGE
1940 AERIAL PHOTOGRAPH CLOSE-UP , FROM THE GORGE TO THE HALF_WAY POINT
1940 AERIAL PHOTOGRAPH ULTRA CLOSE-UP OF THE LINE SHOWN IN PHOTOS 18 TO 32
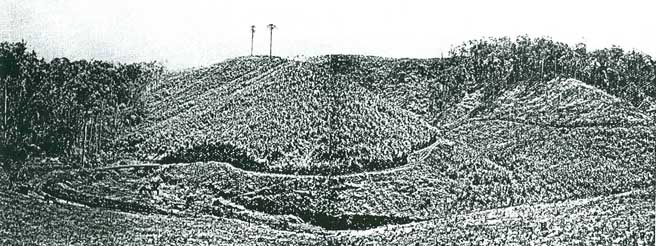
Photo 19: The horseshoe curve and the start of the climb up the Highworth escarpment in 1903.
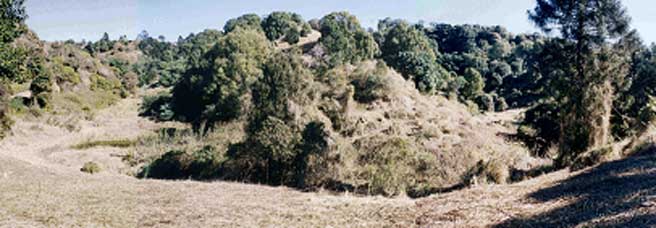
Photo 20: The same stretch of line during the drought of 2004, which revealed many artefacts.

Photo 21: The same stretch of line as it usually appears, in the good season of 2006.
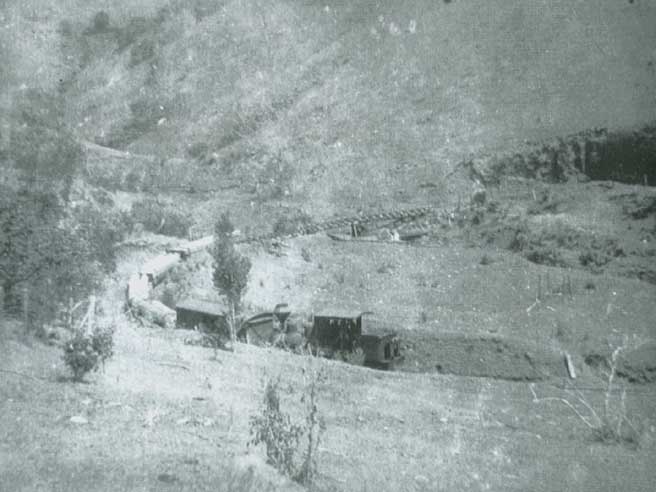
Photo 22: The regular tram behind Mapleton descends the horseshoe curve.
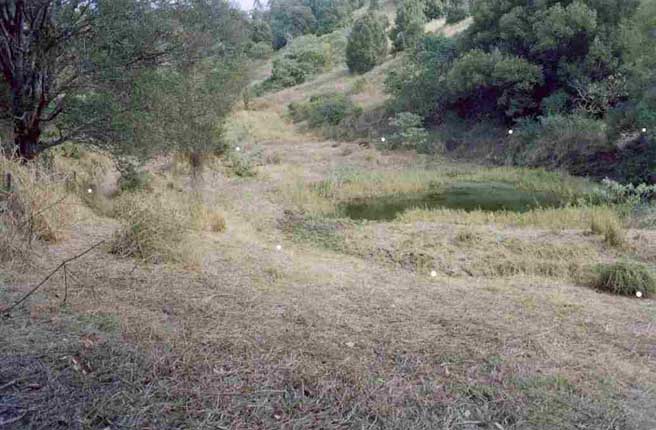
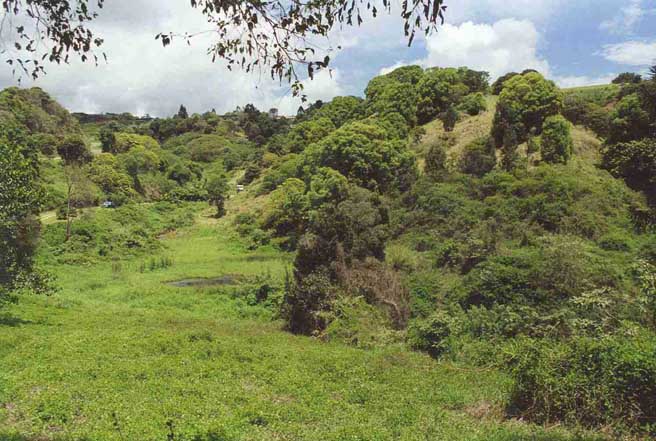
Photo 24: The area of the horseshoe in normal conditions, flooded and
overgrown.
In a dry season, the pond dries up, and if the undergrowth is cleared away, the remains of two large bearers of the horseshoe bridge become visible. A drought in 2004 revealed the bridge for the first time in many years, but good rains have since caused the relics to be hidden in the undergrowth once more. All the remains of bridges show that they were held together with long square-headed bolts, with large square washers and square nuts. Even when the timbers have rotted away completely, the long bolts are still commonly seen at the sites.

Photo 25: The horseshoe bridge in 2004. (Latitude 26° 37' 21.51" S, longitude 152° 54' 59.09" E).
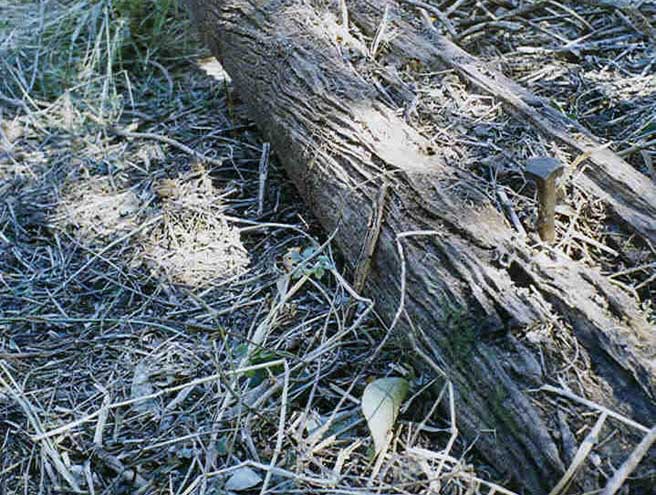
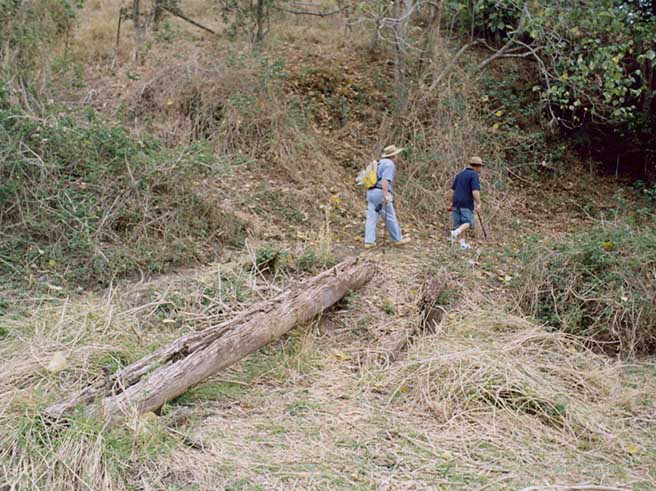
Photo 27: Two people add scale to the bridge.
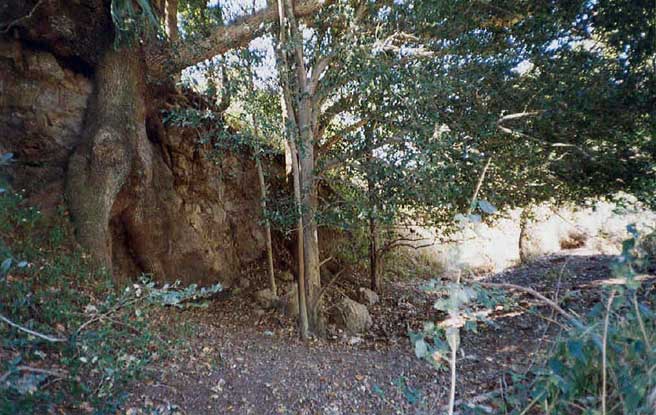
Photo 28: The cutting through basalt immediately uphill from the horseshoe bridge.
Immediately after the horseshoe bridge is a cutting carved through solid volcanic rock. The route now heads north along a ridge running north-east from the main escarpment. Rounding a small spur which overlooks the horseshoe, there is a section where a small landslide has carried away the formation. The tramway straightens up for a short section, which is the site of a well-known photograph showing the Dulong heading downhill with an excursion train (below).
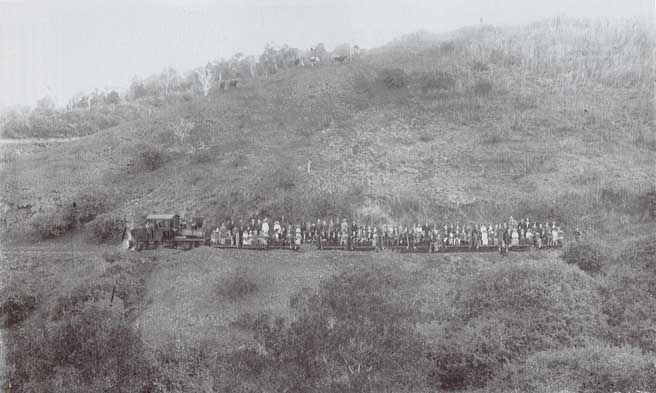
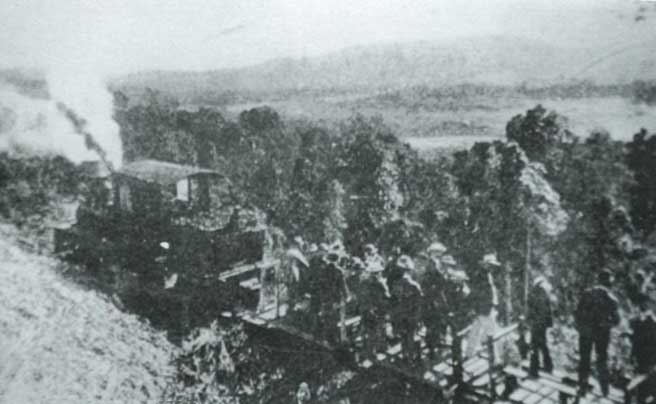
Photo 29: A tram with about 120 people riding on benches bolted to 12 cane trucks descends the Highworth Range behind the Dulong locomotive.
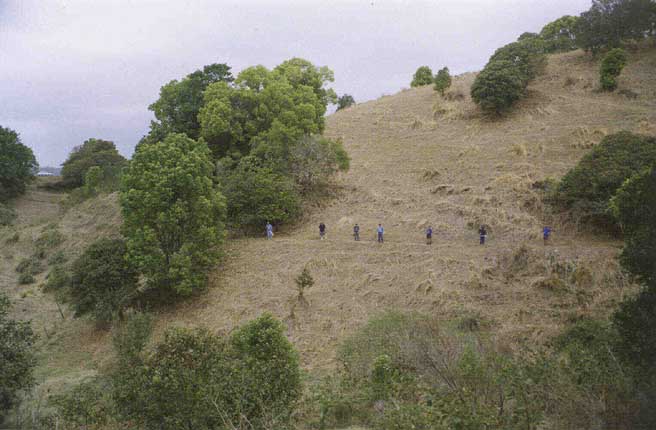
Photo 30: Men lined up on the tram route at the same spot just above the horseshoe curve - note car on Mapleton Road.
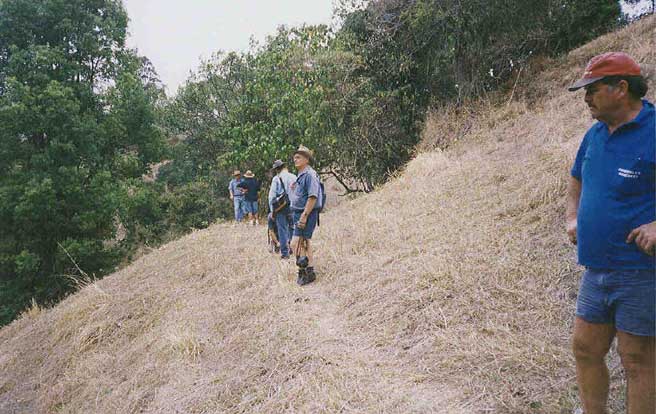
Photo 31: The narrow bench in the slope where the tramway was laid. (Latitude 26° 37' 18.08" S, longitude 152° 54' 59.05" E).
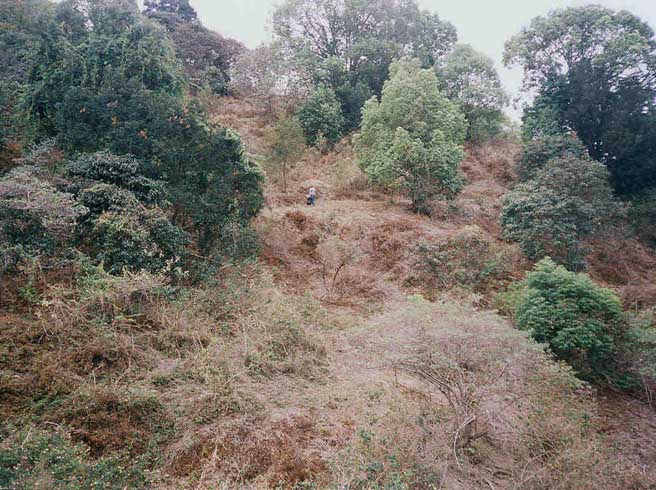
Photo 32: A view from the tramline in Photo 31, across the gully to the photographer at the point where Photos 29 and 30 were taken, also on the tramline where it heads east before swinging north. See the ultra close-up aerial photo below. (Photographer is at latitude 26° 37' 16.13" S, longitude 152° 54' 59.65" E).
1940 AERIAL PHOTOGRAPH ULTRA CLOSE-UP OF THE SITE OF PHOTOS 29 TO 32 - (P = photographer, S = subject)
The route then swings right at the head of a gully. The formation has been damaged at this point by construction of a small earth dam, but the remains of a low single-span bridge are visible. This is followed by another deep cutting, with deep rock walls on both sides. The route climbs around two more spurs and crosses two more bridges (some timbers and bolts evident) before entering a remarkable curved cutting where the gradient eases (Photo 35). Just past this cutting the line straightens out and is almost level, and there are wonderful views over Image Flat and down the Petrie Creek valley to the Pacific Ocean.
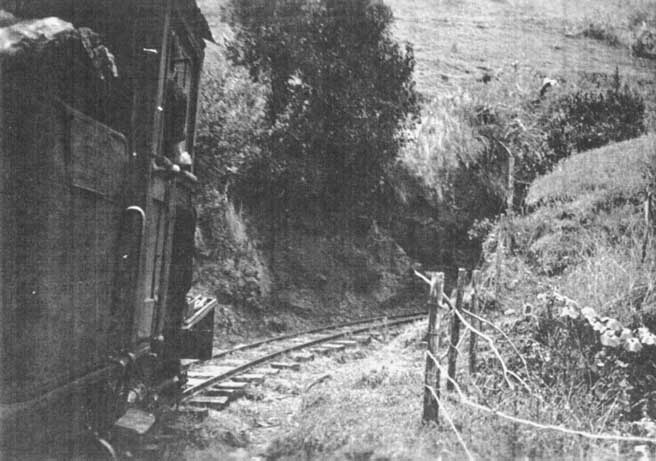
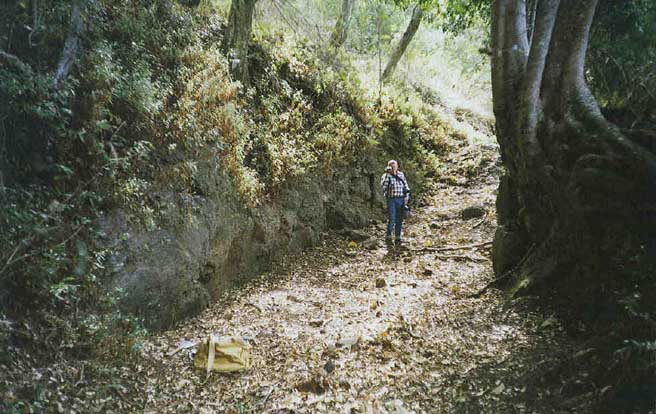
Photo 34: A landslip has filled in part of the cutting. (Latitude 26° 37' 15.95" S, longitude 152° 54' 57.03" E).
Photo 35: A second cutting, higher up the escarpment. (Latitude 26° 37' 10.83" S, longitude 152° 55' 01.57" E).
1940 AERIAL PHOTOGRAPH ULTRA CLOSE-UP OF THE SITE OF PHOTO 36
At this point (marked with the left-hand orange dot on photo 38) the route has turned through a right-angle and now runs north-west along a high spur or promontory into rural residential properties. From here on it crosses such private land, until nearly at Mapleton. It climbs along the side of the spur until it reaches the end (marked with the right-hand orange dot). The route then turns sharply left through 180 degrees and heads south-east along the western slope of the spur.
1940 AERIAL PHOTOGRAPH OF THE ROUTE SHOWING THE CLIMB ALONG THE PROMONTORY IN PHOTO 38 (above) TO DOIG'S POINT AND PHOTO
42
The formation continues to climb along the side of this spur, heading south, then west and south again. It swings right through 170 degrees across a gully, at the point where the spur joins the Highworth escarpment, and then heads north, climbing along that escarpment to the summit at Doig's Point. This part of the climb is shown by two smaller white dots in the distance at right in the photo above, and three white dots in the foreground of the photo below.
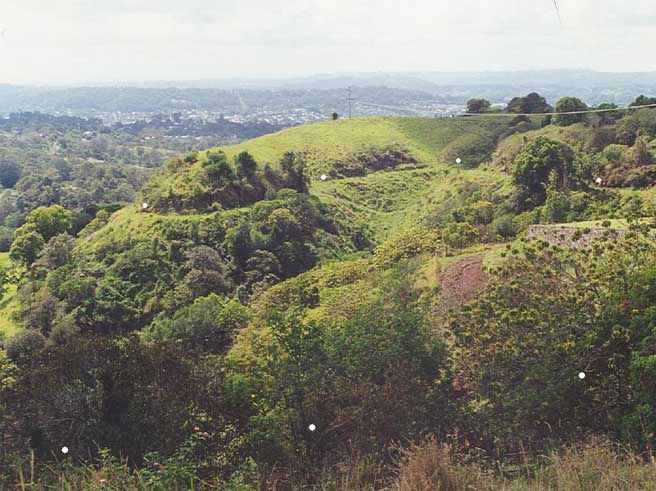

Photo 40: This image is believed to show the Dulong rounding the end of the spur seen in Photos 38 and 39. Photograph courtesy Sunshine Coast Libraries
Photo 39 shows the tram route rounding the end of the high spur or promontory, heading south, and then heading north along the edge of the escarpment, just below Kureelpa Falls Road. The white dot at left centre corresponds with the right-hand orange dot in Photo 25. Approaching the summit, three houses have been built on the formation, and two of then used the roadbed as access driveways.
The deep cutting where the tramway passed under Kureelpa Falls Road was filled in about forty years ago. The entrance of the house at No. 103 on that road is on the alignment, and on the opposite, west side of the road, a driveway curving downhill round to the north-west is exactly on the tramway centre-line. This is the top of Doig's Bank.
Photo 41: The route passed underneath Kureelpa Falls Road in a deep cutting at No. 103. This was the summit of the tram's climb up the Highworth Range and was known
as Doig's Point.
(Latitude 26° 36' 59.24" S, longitude 152° 54' 44.71" E).
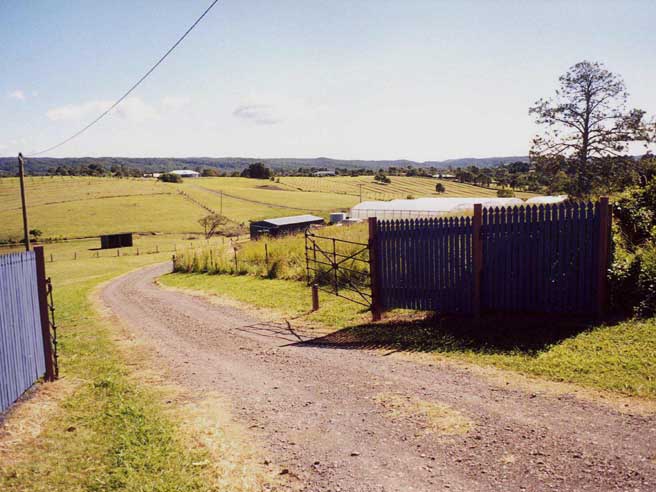
Photo 42: The route heads north-west down Doig's Bank from Doig's Point, taken from Lot 2,
Kureelpa Falls Road, opposite No. 103. The gravelled driveway follows the tram route exactly.
(Latitude 26° 36' 58.76" S, longitude 152° 54' 43.07" E).
4. The main line from Kureelpa Falls Road to the Kureelpa Hall
MAP OF THE LINE DOWN DOIG'S BANK AND AROUND KUREELPA TO THE KUREELPA HALL
Explanation of Map from right to left: From the deep cutting under the Kureelpa Falls Road overbridge, the main line runs north down Doig's Bank. It then crosses a creek and bears to the north-west, running along the south bank of the creek in nearly level country. It crosses Hereford Drive and then swings south-west, across a second bridge. A branch runs off to the north from the western side of this bridge. This branch is described later
1940 AERIAL PHOTOGRAPH OF THE ROUTE SHOWN IN THE MAP ABOVE
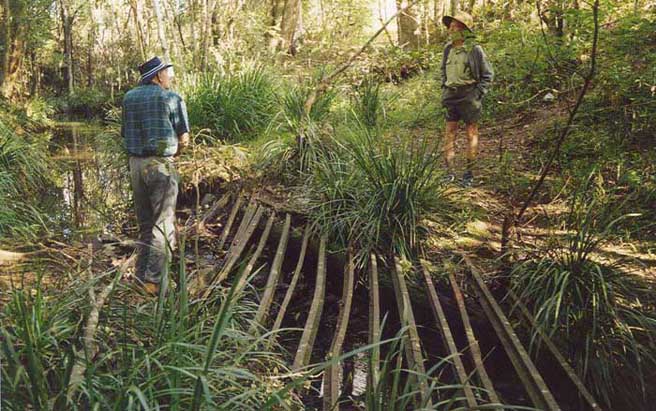
The tram route now makes its way around the cane farms in the valley to Kureelpa Hall. We follow the formation north down Doig's Bank (latitude 26° 36' 49.56" S, longitude 152° 54' 541.00" E) , with very little earthworks visible. As the gradient eases, it swings left to the north-west across a curved embankment (latitude 26° 36' 46.17" S, longitude 152° 54' 39.72" E). which led to a three span bridge across a creek. The creek is in a gully, and the bridge was about five metres high. The bearers are now fallen, but some posts and both abutments are well preserved.
(Latitude 26° 36' 46.17" S, longitude 152° 54' 39.72" E).
The route now follows the creek on its southern side, heading north-west (latitude 26° 36' 42.47" S, longitude 152° 54' 34.60" E). As the land is gently graded, not much was required in the way of earthworks for this section. Nevertheless, the route can be easily traced all the way to Hereford Drive and beyond.
(Latitude 26° 36' 41.44"
S, longitude 152° 54' 32.93" E).
The line now runs parallel with Droughtmaster Crescent, about halfway between that street and the creek to its north, passing through backyards as it goes. The route then swings around to the south-west and crosses a second creek, Surprise Creek, by a 7 metres high two-span bridge. Like the previous bridge, the bearers are now fallen, but one post still stands, and both abutments are well preserved.
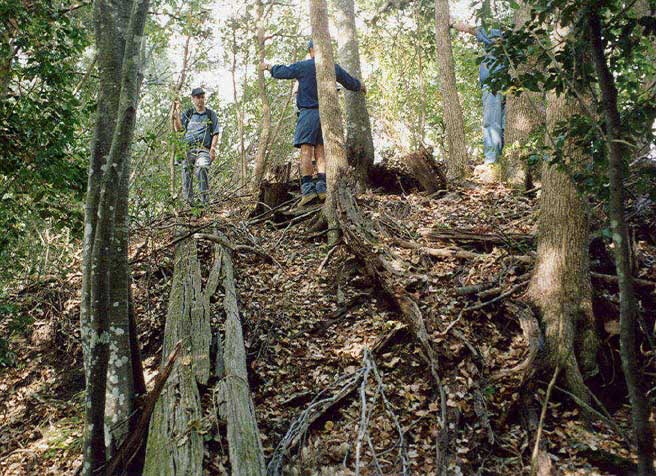
Photo 45: The bridge over Surprise Creek at the west end of Droughtmaster Crescent.
(Latitude 26° 36' 38.72"
S, longitude 152° 54' 23.57" E).
The tram route now heads south, through the backyards of all the residences on the eastern side of Angus Crescent, Lots 10 to 12 and 52 to 55. The line is climbing gradually, following the 250 metre (approx. 800 feet) contour and running along the western bank of Surprise Creek. Soon it swings to the right, passing below the tennis court of the house that was once owned by Captain Jewett, No. 25 Angus Crescent. This is where the Mapleton ran away and was derailed in 1934. The earthworks of this section are visible from both Jewett Road and the Mapleton Road, and are most noticeable under a low sun and when the grass is short.
Photo 46: The roadbed where the tram derailed can be seen from Jewett Road crossing the middle of the picture.
(Latitude 26° 36' 54.72" S, longitude 152° 54' 15.26" E).
Photo 47: Viewed from the Mapleton Road, the tram formation crosses the middle of the picture. Jewett's house and
tennis court are visible above centre.
(Latitude 26° 36' 54.72" S, longitude 152° 54' 15.26" E).
The tram route now turns sharply south-west. Today's Jewett Road is on the alignment of Captain Jewett's tree-lined driveway, which ran along the crest of a low spur from his house to meet the Mapleton Road next to the Kureelpa Hall. The formation crosses Jewett Road, and then continues south along the west side of that road (but on the other side of the fence from the roadway) until it reaches the Kureelpa Hall where it curves to the west in a small cutting under two large gum trees. A siding was located here for storage of wagons if a train needed to be divided for the climb up Christie's bank. A set of trailing points leading across the Mapleton Road to the Dulong branch turned off to the south from near the Hall. This branch will be covered in Section 12 .
Photo 48: The tram formation adjoining the west side of the Kureelpa Hall, with traffic to
Nambour on the Mapleton Road.
(Latitude 26° 37' 01.40" S, longitude 152° 54' 02.87" E).
5. The main line from Kureelpa Hall to Willandra Court
MAP OF THE LINE FROM KUREELPA HALL, DOWN CHRISTIE'S BANK TO SHERWELL ROAD
Explanation of Map from right to left: The main line appears from the right, crossing Jewett Road before reaching the Kureelpa Hall. The facing points to the Dulong Branch took that Branch over the Nambour-Mapleton Road to a dead-end. In the manner of a zig-zag, the line then turned back on itself and headed south-east before turning south towards Dulong. The main line to Mapleton ran north-west, then north, down a steep bank called 'Christie's Bank' which led down into the valley of the South Maroochy River. Swinging around the end of a low spur in a semicircle, the line turned south-west and headed through what is now Shamley Heath estate towards the river. The river and a nearby creek were crossed by two long bridges. Just west of the South Maroochy River bridge, Pope's Siding ran off to the north a short distance, and then turned west. This siding is described later. The main line crossed what is now Willandra Place, and then turned south through ninety degrees to cross the Nambour-Mapleton Road. Continuing south, it soon swung south-west to cross Sherwell Road.
1940 AERIAL PHOTOGRAPH OF THE ROUTE SHOWN IN THE MAP ABOVE
The tram route from here to Mapleton was built by the Shire Council in 1915. From the west side of the Kureelpa Hall the track curves to the right across a low embankment, heading north and then curving left to skirt the eastern slope of a hill. We are now at the top of Christie's Bank, a descent towards a creek, crossed by a high embankment that still exists. The present owners keep this section of the formation in good repair.

Photo 49: Walking down Christie's Bank.
(Latitude 26° 36' 53.93" S, longitude 152° 53' 49.58" E).
The tram route can be easily followed, climbing slightly from the creek. It passes through a spectacular cutting and then heads north-east along an embankment made of fill from the cutting. It is open country, and there are good views over Kureelpa.
1940 AERIAL PHOTOGRAPH OF THE ROUTE FROM KUREELPA HALL TO THE SOUTH MAROOCHY
RIVER VALLEY, DOWN CHRISTIE'S BANK
Following a low ridge to its end, the route then circles left through a large U-bend of nearly 180 degrees, taking us round the end of the ridge to head south-west into the valley of the South Maroochy River, where the Shamley Heath estate is now located. The formation in this section is plainly seen high up on the slopes to the east from No. 11 Goodey Way in the estate.
(Latitude 26° 36' 43.53" S, longitude 152° 53' 43.23" E).
The route now enters rural residential properties once again, and earthworks for roads and houses in the estate have obliterated the roadbed. It crossed Shamley Heath Road just north of the intersection with Heath Lane, then crossed the lane to its southern side and almost immediately recrossed it again, entering Lot No. 19. The present driveway to this Lot appears to be actually on the old tramway formation. We are now at the bottom of Christie's Bank, and in the vicinity of the water tank in Bailey's paddock.
1940 AERIAL PHOTOGRAPH OF THE ROUTE IN THE VICINITY OF THE SOUTH MAROOCHY RIVER
BRIDGES
The tram route now enters paddocks once more, heading west-south-west towards the South Maroochy River. About 150 metres before we reach that river there is a creek, and both watercourses were crossed by high trestle bridges. That over the creek had seven spans, and that over the river had five. Substantial parts of these bridges still remain, with four sets of trestles still erect. Two bearers are still on top of their trestles, while others have fallen. The earthworks either side of the bridges and between the two are well preserved, with even a borrow pit on the north side of the embankment between the bridges still remaining. The bridges are visible from the property at No. 690-708 Mapleton Road.
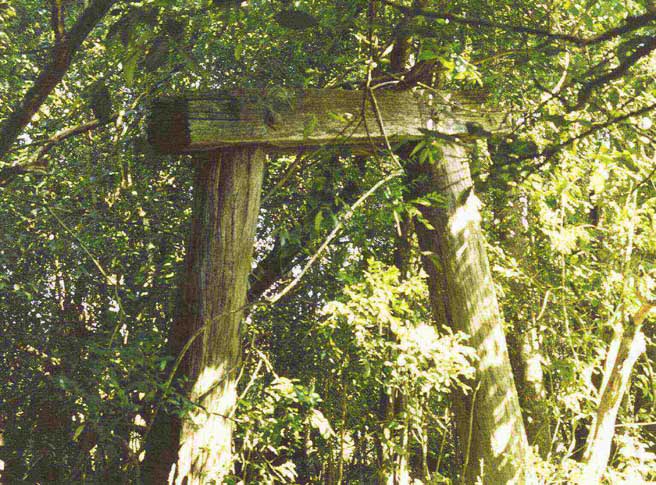
Photo 51: The remains of the trestle bridge over the creek.
(Latitude 26° 37' 01.68" S,
longitude 152° 53' 14.80" E).
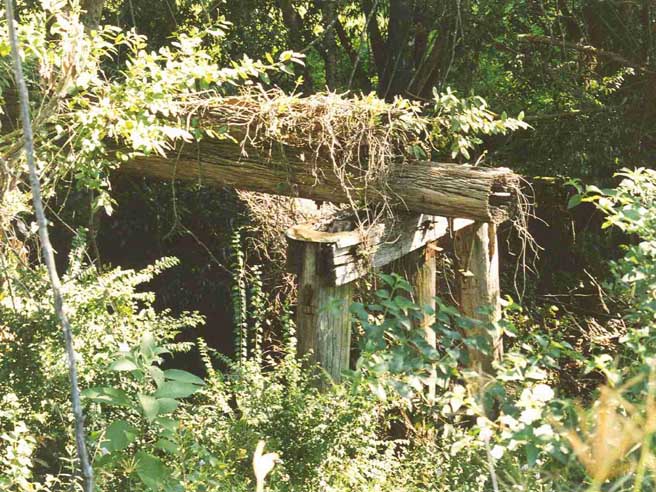
Photo 52: The remains of the bridge over the Maroochy River.
(Latitude 26° 37' 03.60" S, longitude 152° 53' 11.59" E).
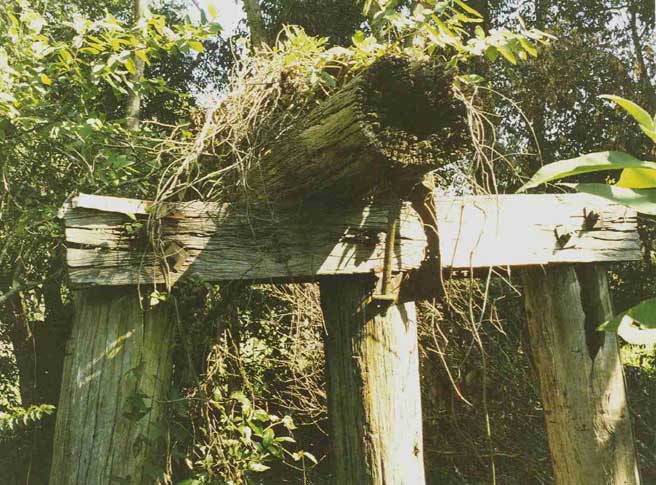
Photo 53: A close-up of the end of the bridge.
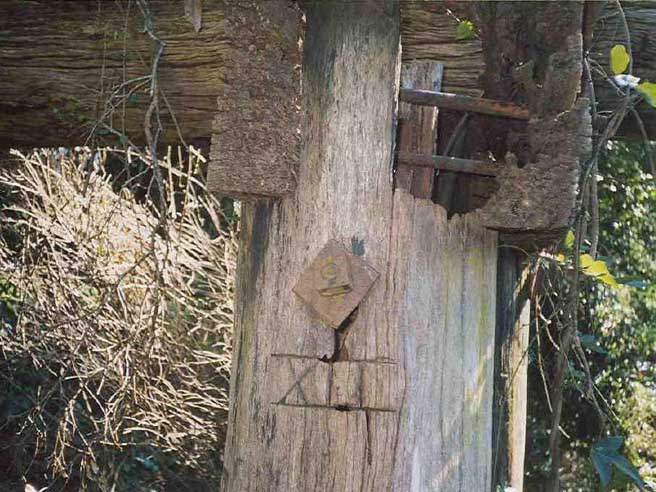
Photo 54: An inscription 'XII' is carved on a main support..

Photo 55: The remains of the bridge as seen from water level (the river is so small it can be stepped over, except when in flood).

Photo 56: The embankment and borrow pit (right) between the two bridges shown above.
Photo 57: The site of Pope's (Story's) siding. The gravelled driveway indicates the old tramway roadbed.
(image copyright Space Imaging)
A hundred metres or so beyond the Maroochy River bridge is the site of Pope's siding. The formation here has been destroyed. The tramway roadbed next is seen as the driveway to Lot 3 in Willandra Place. The route crosses from the eastern side of Willandra Place to its western, and then turns south through nearly a right-angle to head for a crossing on the Mapleton Road. An embankment or ramp exists which allowed the tram to climb up to cross the road, and the route continues on the south side of the Mapleton Road at No. 745, the driveway to that property using part of the old formation.
Photo 58: The ramp leading to the Mapleton Road level crossing. Mapleton is on the skyline.
(Latitude 26° 37' 10.82" S,
longitude 152° 52' 55.00" E).
Photo 59: The ramp to the level crossing as seen from the roadway.
(Latitude 26° 37' 12.22" S, longitude 152° 52'
54.94" E).
A gate and driveway are located on this part of the formation, at No. 745. If one stands at this point and then walks north directly across the road, the small embankment leading to the level crossing will be at your feet. Short grass and a low sun will emphasise the formation. The line swings south-east, then round to the south-west through a small cutting (visible from the road), and then curves to the right to cross Sherwell Road just north of No. 37.
Photo 60: The route south along the driveway at No. 745. A large steel shed has been built near here recently.
(Latitude
26° 37' 13.07" S, longitude 152° 52' 55.00" E).
6. The main line from Willandra Court to the outskirts of Mapleton
1940 AERIAL PHOTOGRAPH OF THE ROUTE AS SHOWN ON THE ABOVE MAP
1940 AERIAL PHOTOGRAPH OF THE ROUTE FROM MAPLETON ROAD, ACROSS SHERWELL ROAD AND
CLIMBING THE BLACKALL RANGE TO AMOS' TANK AND THE RIGHT-ANGLED CURVE
The route now swings to the west and crosses Sherwell Road to enter what is now the Spring Pastures estate.

Photo 61: The part of the route climbing west towards the site of the Sherwell Road level crossing.
(Latitude 26° 37'
21.09" S, longitude 152° 52' 54.58" E).
(image copyright Space Imaging)
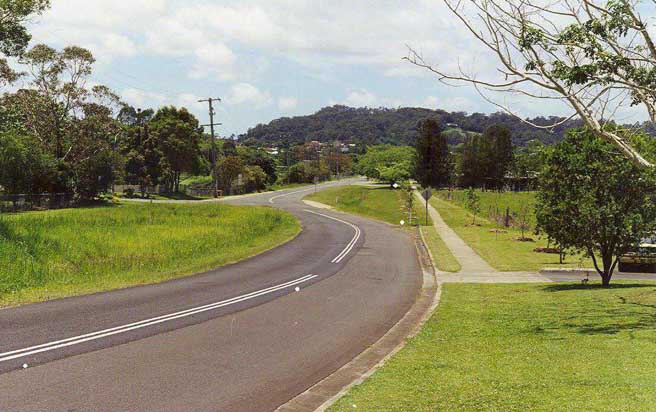
Now the tram route then begins to climb in a south-westerly direction up the Mapleton escarpment. The eastern end of the new Spring Pastures Drive follows the formation closely for about 200 metres. The tramline may be seen as a slight indentation in the northern slope just above the road. The tram route turns towards the south from this road almost under the Palmwoods-Woolooga high-voltage power transmission lines, and climbs round the southern side of a knoll which is surmounted by a steel shed.
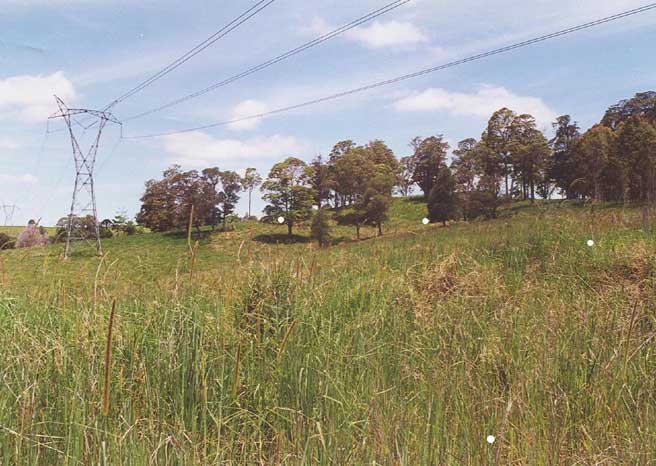
Photo 62: The tram formation climbs south-west under the high-tension power lines, to curve around a knoll.
Then it curves back to climb along the Mapleton Range. Tree clearing in the new Spring Pastures Estate below Mapleton has revealed much of these earthworks, but they are rapidly being lost when the housing blocks are sold and then built on. Unfortunately, some of the new homes in the area have been placed squarely on the old earthworks, completely obliterating them in places. On the other hand, some residents have shown an interest in the tramway, and have made plans to preserve part of the roadbed. Some have helped their neighbours become aware of the historical significance of the shallow cuttings visible here and there in their properties, two such environmentally-aware people being Leo and Charon Phelan.
Photo 63: The tram route running north-west from the knoll,
south of Spring Pastures Drive, looking downhill.
(Latitude 26° 37' 44.54" S, longitude 152° 52' 38.00" E).
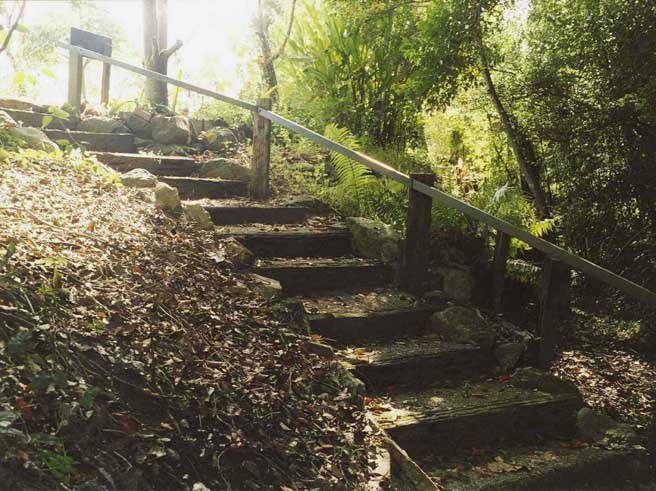
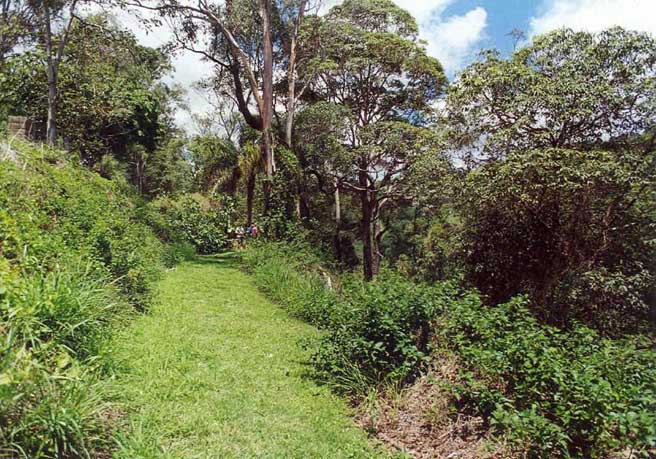
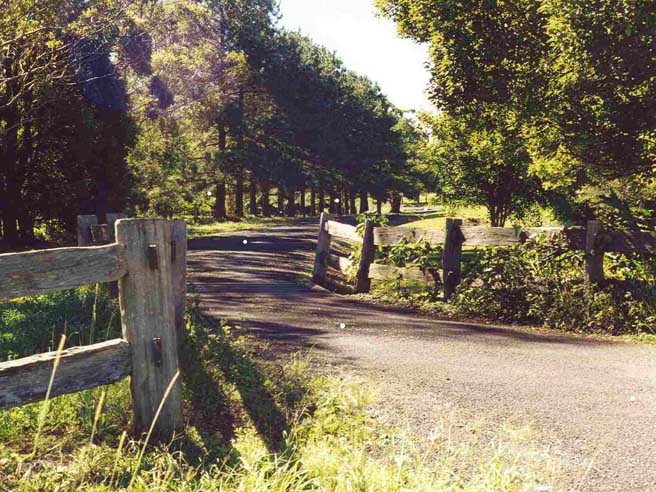
At the western end of Spring Pastures Drive there is a concrete easement running up the hill. The tram formation passes through the very end of this easement, and then enters a reserve where it can be followed on public land. Part of the formation was used in the past as a walking track, and has been gravelled. The occasional sleeper and dog spike can be found in this section, although new homes have been built in the area since the picture below was taken in 2002.
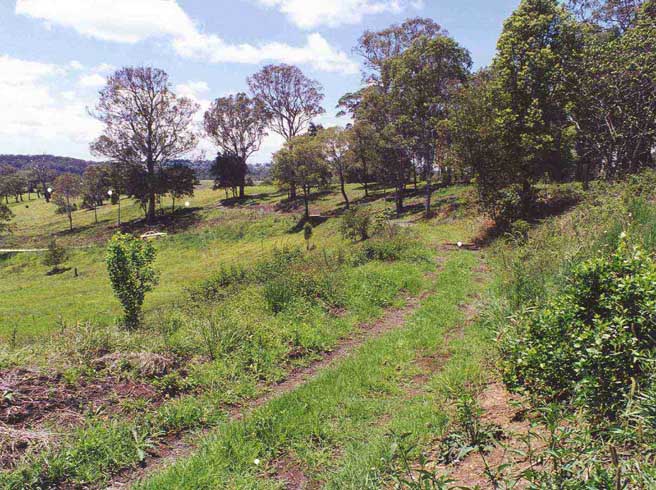
Photo 64: The tram route running north-west at the end of Spring Pastures Drive, looking downhill. A car is
parked on the concrete easement.
(Latitude 26° 37' 10.82" S, longitude 152° 52' 55.00" E).
A curved cutting is well preserved here. The gravelled surface was put in as an Australian Bi-centenary project in 1988. It formed part of a walking track that ran through a nature reserve from Mapleton's Ringwood Lane to Spring Pastures Drive, but the track becomes regularly overgrown from lack of use.
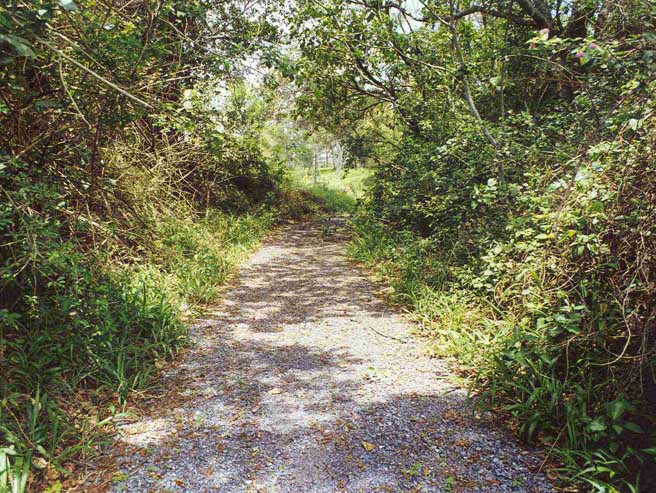
Photo 65: This tramway cutting, recently gravelled as a
walking track, can be seen on the aerial photograph below.
(Latitude 26° 37' 44.66" S, longitude 152° 52' 27.11" E).
1940 AERIAL PHOTOGRAPH OF THE CUTTING ABOVE AND THE RIGHT-ANGLED BEND (centre).
AMOS' TANK WAS BETWEEN THE TWO
Going uphill, the tram route curves to the left, and passes a wet patch. This is the spring where Amos' water tank was located, and there is a small washaway there. It then swings to the right, still climbing. From here to Crystal Street in Mapleton the route is easily followed, but it is quite often overgrown. In the past it has been used as a track by horse riders, mountain bikers, and the occasion vehicle, but in good seasons it becomes quite overgrown. Beyond the tank there is a sharp right-angle bend to the left, and the line runs in a westerly direction.
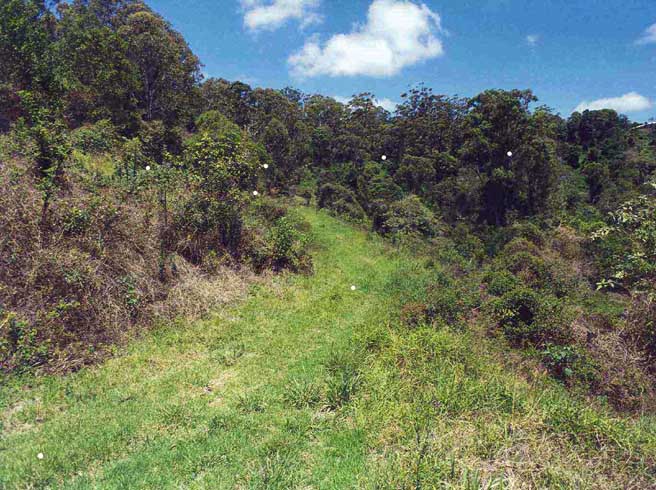
Photo 66: This is the right-angled bend where the tramway turns to the left to run along the escarpment.
(Latitude 26° 37'
41.21" S, longitude 152° 52' 22.11" E).
This section of the formation can be be observed from below No. 867 on the Mapleton Road, three-quarters of the way up the range, just before the road swings to the north. A different view of this section may be obtained from north-facing blocks in Ringwood Lane, in the New Forest Rise estate off Flaxton Drive.
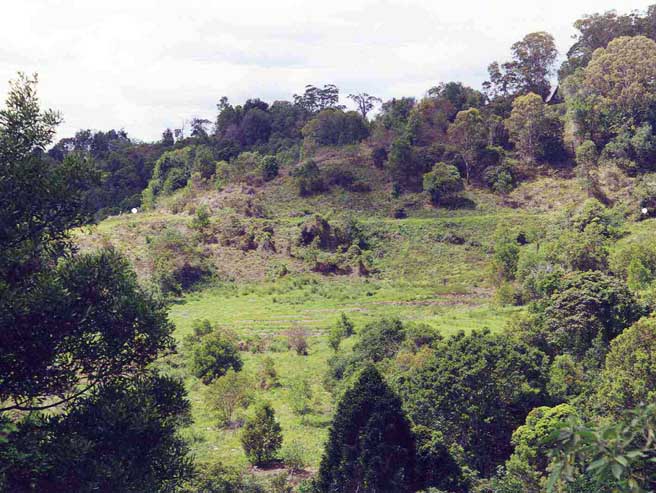
Photo 67: The tram formation visible across the valley from the Mapleton Road.
(Latitude
26° 37' 41.21" S, longitude 152° 52' 22.11" E).
The route now turns north along the escarpment. This section is heavily overgrown and virtually impassable. It is now passing the the eastern allotments of Mapleton.
Top List of routes
7. The route in Mapleton itself
1940 AERIAL PHOTOGRAPH OF THE ROUTE AS SHOWN ON THE ABOVE MAP
(image copyright Space Imaging)
The route in Mapleton itself can be found about 85 metres down the slope from the back fences of homes built on blocks to the east side of Crystal Street and Emerald Court. A landslip in the area near where the curved bridge was (near Lot 14 in Topaz Street) has blocked part of the formation, and this area is usually overgrown with long grass and lantana. The back boundaries of Lots 17 and 18 in Topaz Street are defined by the tramline formation.
The area around the level crossing over the Mapleton Road just below the village of Mapleton has changed since the days of the Tram. When the road to Nambour was sealed in 1963, the grades were eased by putting in cuttings, and this work destroyed the actual level crossing and much of the formation which ran for a short distance nearly parallel with the road. The approaches on either side away from the road cutting can be detected, however.
Allotments on
the eastern side of Lantana Lane have the tramway easement directly at their rear boundaries.
Photo 68: The tram formation has been sealed to make a driveway off Post Office
Road.
The route crosses the Lilyponds Caravan
Park and enters the Lilyponds Park, heading south-east. The entrance driveway to the Lilyponds is
part of the old formation, and the route crosses Delicia Road at the Lilyponds
gateway. It goes directly past the site of the sawmill on the right, and passes
under The Old School House.
It continues across the Obi Obi Road and turns parallel to that road to its
terminus, the Mapleton Station.
Photo 69: The driveway into the Lilyponds Park defines the tram route.
(Latitude 26° 37' 11.78" S, longitude 152° 51' 43.86" E).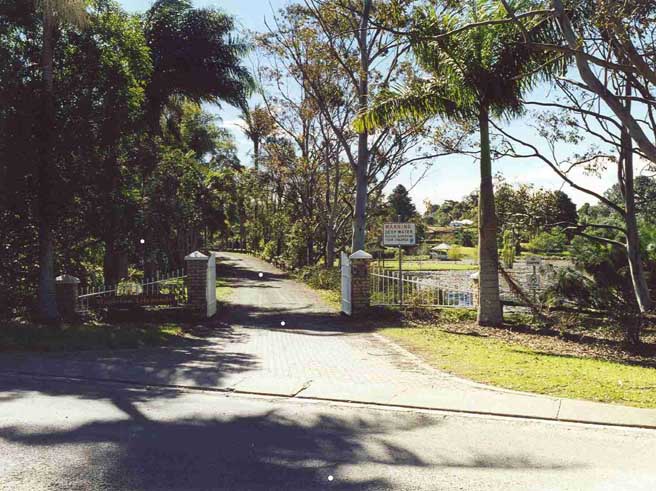
(Latitude
26° 37' 26.54" S, longitude 152° 51' 50.97" E).
(Latitude 26° 37' 28.56" S, longitude 152° 51' 51.26" E).
1940 AERIAL PHOTOGRAPH OF THE VILLAGE OF MAPLETON
The area of the old Tramway Station is on
the south-east side of the Obi Obi Road opposite the Mapleton Public Hall, and
is now largely taken up with new housing.
Dog-spikes, old sleepers and various
other tramway relics may occasionally be found along the route. It is fairly
common for sleepers to be found by residents whose properties straddle the
tramline formation.
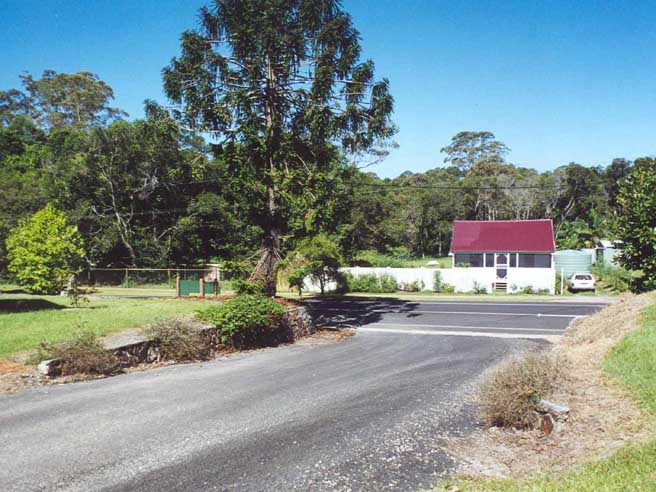
Photo 71: The site of the Mapleton Station, as viewed from the Mapleton Public Hall.
8. The Coe's Creek Branch
This branch started from near Jakat's house at the intersection of Perwillowen Road and Puddle's (Windsor) Road. It followed Perwillowen Road in a south-westerly direction, and then turned south. Part of the present Coes Creek Road follows the old roadbed. It turned to the west when it reached Coes Creek, and followed the creek up into lands now owned by the Department of Primary Industries research station. Some bridge abutments at Coes Creek remain today. The total length of this branch was 2 kilometres (1 mile 20 chains), and it is possible that the rails were lifted early in 1921.
Top List of routes9. The Perwillowen Branch and its sub-branches
The Perwillowen branch left the Dulong line at a junction near the end of Puddle's Road and at the point where the main line turned north-west and began the climb up to Highworth. This branch then headed south-west and west for more than a mile. Near the junction there was a bridge over Whalley Creek where the waters cascaded over a rocky bar. The remains of this bridge, including a length of rail and a concrete-reinforced abutment, can be seen about thirty metres due south of the Rotary Garden Village's croquet lawn.
About ten chains west of this bridge,
there was a short spur running off to the north-west. This was called the
Burnside Spur and was apparently removed quite early, but later rebuilt around
1925. No traces of the Burnside Spur have been located as yet.
The main branch then headed in a direction a little to the south of west, and then climbed almost due west along a long, sloping hillside. It crossed to the southern side of Burnside Road near the top of this gradient. (latitude
The line then levelled out and crossed the creek at a new bridge site, about 30 metres downstream from the former crossing. (latitude 26° 38' 06.90" S, longitude 152° 55' 48.17" E).
At a point where the creek made a Z
-bend, the main branch, continuing straight on from the junction, crossed a substantial bridge to the northern bank of the creek
In 1918
it was suggested that the main tramline to Mapleton be deviated to better serve
the Perwillowen district. In a proposal put by the Officer in Charge of Surveys
of the QR, this was to be achieved by building 3 miles 20 chains (5.2
kilometres) of new line
from just before the existing terminus of the Perwillowen Branch. There would
have been a cutting and an overbridge at Burnside Road. The line was then to
climb a ridge and then the side of the Highworth Range, passing under the
Mapleton Road through a cutting 11 to 13metres deep. It seems that the proposed
line was then to connect to the existing route at the top of the Highworth
Range, at Doig's. The ruling gradient was to have been 1 in 20, but the very
steep and sharply curved horseshoe section below Murtagh's house would have
been eliminated. This could possibly allow the Mill's conventional locomotives
to reach Mapleton if needed by the Council.
The
country to be traversed was then used for banana plantations, and Perwillowen
farmers believed that they could increase production if a tramway service was
provided. They offered to pay for a complete survey, but the Shire Council was
doubtful that such a line could pay for itself. It was thought that the
suggested realignment would allow conventional locomotives to run up to Mapleton
but, considering the 1 in 20 grades, that is unlikely. One Councillor suggested
a one mile branch instead, and this was reported in The
Chronicle on 13th September 1918. Nothing came of either proposal.
Over the years the bridges
became decrepit. A local resident states that, in the late 1930s, when the westernmost bridge near Briggs Road
10. The Image Flat Branch and its sub-branches
1940 AERIAL PHOTOGRAPH OF THE ROUTE AS SHOWN ON THE ABOVE MAP
The Image Flat branch is almost completely located
on two cattle properties, and not much can be seen from public roads. In
the past however, both owners have
generously welcomed visitors who have a genuine interest in seeing what
remains of the main branch and the sub-branches. There are
numerous relics such as a well-preserved culvert near the Highworth junction and the remains of two bridges
near the Perry Road end.
1940 AERIAL PHOTOGRAPH OF THE IMAGE FLAT BRANCH, CENTRED ON THE LONG RAMP
The Perry Road branch formation terminates near the end of that road. The Finbury branch earthworks head north-west, passing through a skyline cutting at its highest point, where it crosses a ridge between two creeks. This is where the 1900-07 settlement of Russian Finns was located. Here we can find large-scale earthworks leading to the site of a 10 metre high bridge. A few bridge timbers still exist, although fallen.
1940 AERIAL PHOTOGRAPH OF THE ENVIRONS OF THE 10 METRE HIGH BRIDGE (centre) WITH
THE TWO ROCKY KNOLLS (north-north-east of the bridge)
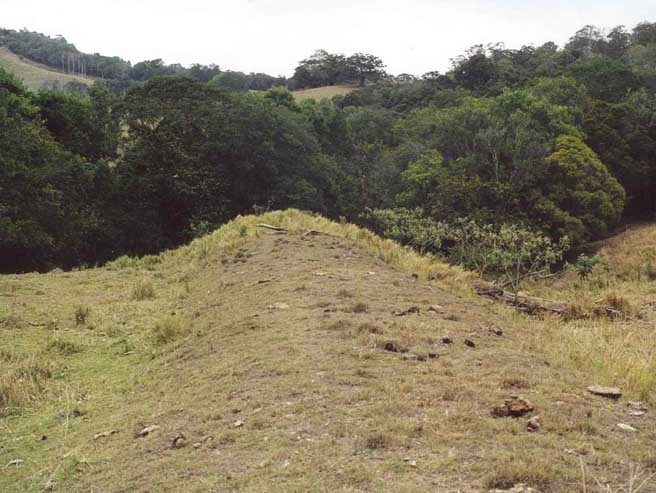
Photo 75: The embankment leading to the eastern abutment of the 10 metre high bridge.
(Latitude 26° 36'
32.52" S, longitude 152° 55' 22.27" E).
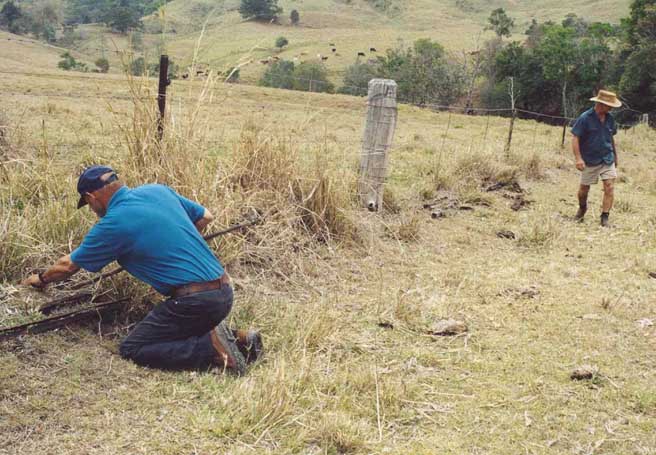
Photo 76; Piles of sleepers and rails still stacked along fence lines.
(Latitude 26° 36'
33.62" S, longitude 152° 55' 23.94" E).
Alongside fences
parallel to the embankment leading to the bridge are piles of sleepers and
lengths of rail. These were placed there by the owners when struck with ploughs after the area was being
cultivated for planting with potatoes after cane growing had ended. Obviously,
poor quality or damaged rails were left where they lay after the line was
closed, useable rail being removed for use elsewhere. Most sleepers were not
retrieved.
Another spur ran from near the high bridge to the north-east. Two rocky knolls, actually low heaps of shattered rocks, were near the route of a spur to the north-east. Instead of avoiding these rock piles, the line headed for one, then the other. A way was forced through the piles, involving the manual removal of thousands of rocks to clear a level roadbed. Why this was done is anyone's guess, but the evidence remains there to this day. This spur terminates near a dam.
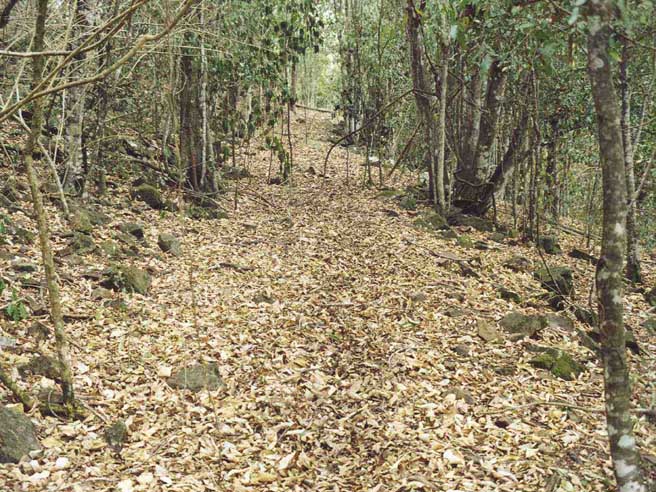
Photo 77: The tramway route forced through the stones of a rocky knoll.
(Latitude 26° 36'
27.85" S, longitude 152° 55' 22.46" E).
Nearby are the earthworks of a spur
leading to the south-west, and some lengths of badly rusted portable track are
still present.

Photo 78: Remnants of portable track still in situ on the south-western spur.
(Latitude
26° 36' 34.83" S, longitude 152° 55' 16.82" E).
11.
1940 AERIAL PHOTOGRAPH OF THE KUREELPA BRANCH AND ITS SUB-BRANCHES, SOUTH TO
KUREELPA HALL
1940 AERIAL PHOTOGRAPH OF THE KUREELPA BRANCH AND ITS SUB-BRANCHES, CLOSER VIEW
1940 AERIAL PHOTOGRAPH CLOSE UP, OF THE KUREELPA BRANCH AND ITS SUB-BRANCHES
As far as we know, this branch and its spurs has not been described elsewhere. No records of it have been found, possibly because it was built and paid for by the farmers themselves, not by the Moreton Mill nor the Shire Council. Yet the remains of two bridges in Kureelpa itself indicate that it was built to the same standards and using the same hardware as those bridges on the main line.
Mr Ted Schroder, who lived in the area when the tram was in operation, states that this branch closed in the mid-1920s.
The main branch extended from near the main line's bridge over Surprise Creek and headed north. It was composed of normal track, and connected to it with a set of regular points. This branch headed north across Murray Grey Drive near Surprise Creek , passing along what is now the driveway of No. 27
Turning sharply to the north near the northern boundary of No. 36 Murray Grey Drive, it crossed this creek on a substantial bridge, some bearers, bolts, sleepers and rails of which are still jumbled together at the site. The south abutment still stands.
Photo 79: Looking across the paddock in No. 1 Shorthorn Crescent. The truck is parked by the creek which forms the northern boundary of No. 36 Murray Grey Drive. The remains of the substantial bridge are near the front of the truck. The tram roadbed runs from the photographer through the fence towards the rear of the truck, where it turns sharply right to cross the bridge.

Photo 80: Sleepers, a rail and a bridge bolt at the north abutment of the substantial bridge,
36 Murray Grey Drive.
(Latitude 26° 36' 29.00" S, longitude 152° 54' 05.00" E).
Numerous dog spikes, smaller than the main line variety, have been found along this section, especially in No. 4 Shorthorn Crescent and Nos. 30 and 36 Murray Grey Drive. Two well-preserved pieces of rail found there are as heavy as that used on the main line. The existence of small pieces of coal along this section and the size of the bearers in the substantial bridge indicate that the branch was used by the Shay locomotives for some distance past this particular bridge.
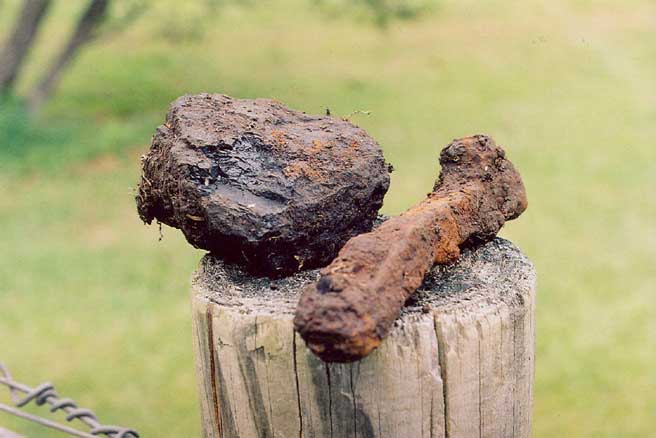
Photo 81: Lump of coal and small dog spike found on the tramway formation at 7
Angus Court, Kureelpa.
(Latitude 26° 36' 36.33" S, longitude 152° 54' 21.10" E).
This branch then headed north until it crossed Surprise Creek on another bridge between two macadamia nut plantations. Some heavy rails have been found in this area, one with fish plates and fish bolts still attached, along with a small section of a second rail. This bridge, of which two bearers remain more or less in position (see below), is also designed to similar standards as used on the tramway's main line to Mapleton, but the bolts are of a smaller cross-section. The southern abutment still stands, but the northern one has been removed, possibly when earthworks were being undertaken for the nut plantation.
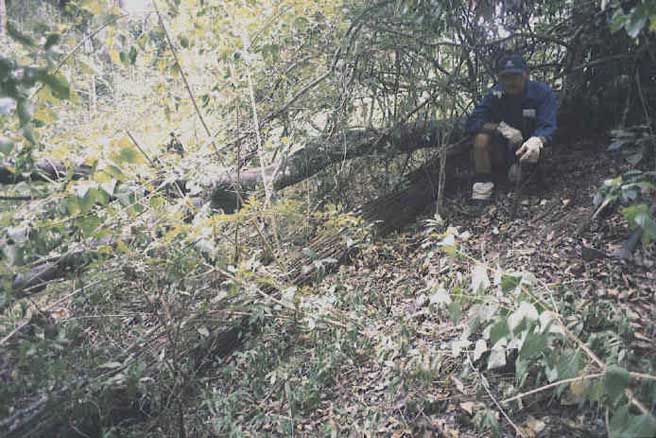
Photo 82: Remnants of the bridge, showing fallen bearer and southern abutment.
(Latitude 26° 36' 19.76" S, longitude 152° 54' 06.21" E).
Locomotives could have crossed this bridge, but they would have ventured no further. Adjacent to the site of the northern approach to the bridge, a number of portable rails, steel spacers, clamps, nuts, washers and bolts are lying together in a small stand of trees. The rails and some spacers are severely corroded, but a few of these relics are in good condition for their age.
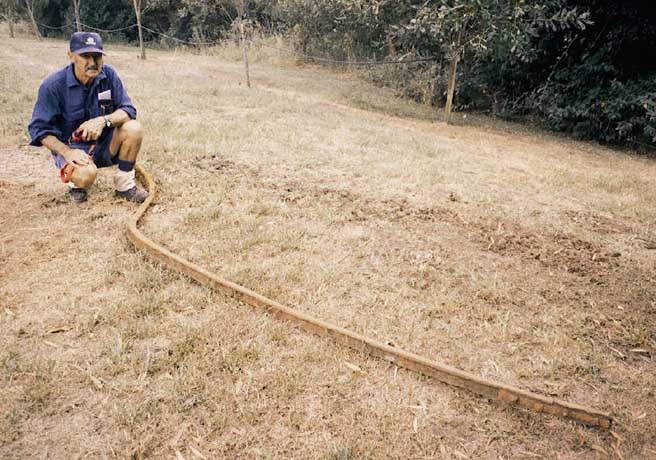
Photo 83: Length of well-preserved rail, found buried in the southern approaches to the bridge in
Photos 80 and 82. This is normal rail, not portable, and indicates that locomotives were used at least as far as the bridge, a supposition supported by the discovery of
a lump of coal nearby (Photo 78).
(Latitude 26° 36' 20.21" S, longitude 152° 54' 05.94" E).
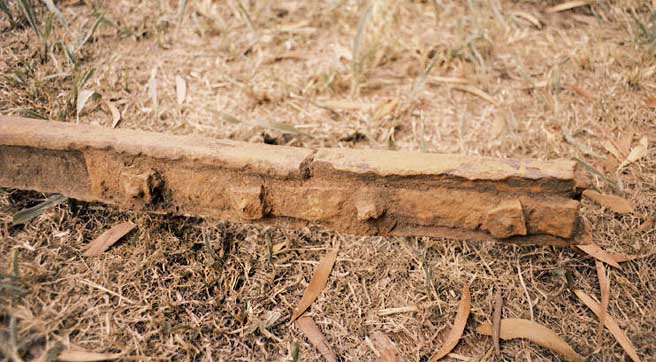
Photo 84: The end of the rail in Photo 83, showing a short piece of rail bolted to its end using fish plates and square-headed bolts and nuts.
From here north towards a crossing of Kureelpa Falls Road, the track appears to have been portable, judging from the artefacts remaining along the route. There are no earthworks remaining, but evidence from a metal detector indicates that the line followed the contours of the land though steadily climbing, and, once laid, was left in position.
It appeared on initial inspection that there may have been a spur running north from a point east of Shorthorn Crescent, and crossing Surprise Creek again at a low bridge that still exists, but that bridge
differs from tramway design. The southern approach is down a short slope, so it was probably a road bridge, used by horses pulling slides loaded with cane from the extensive paddocks to the north and north-east, and later by tractors and trucks for general farm access.
Heading
north from the Kureelpa Falls Road crossing (latitude 26° 36' 10.71" S,
longitude 152° 54' 01.97" E), there were two spurs of portable
track. One ran east up a fairly steep grade, parallel with the road, and then
swung left in a semicircle to service a large paddock (latitude 26° 36' 06.39" S, longitude
152° 54' 08.39" E). Little of this spur remains, but there are enough
portable track bolts and clamps still in the ground to enable it to be easily followed with a metal detector.
The second spur runs north, over two substantial bridges, and continues for about
350 metres towards the edge of the escarpment. Its terminus was in the vicinity of an existing fence
(latitude 26° 35' 59.24" S, longitude 152° 54' 00.95" E). Both bridges
were destroyed in bushfires, but the bearers remained unburnt where they were embedded in the ground. Erosion has revealed the burned stubs protruding from the
surface.
Photo 85: The owner of the land, Mr Dennis deVere (centre), and the writer, locating the steel
sleepers in his paddock. Mapleton is on the skyline.
(Latitude 26° 36' 02.61" S, longitude 152° 54' 04.22" E).
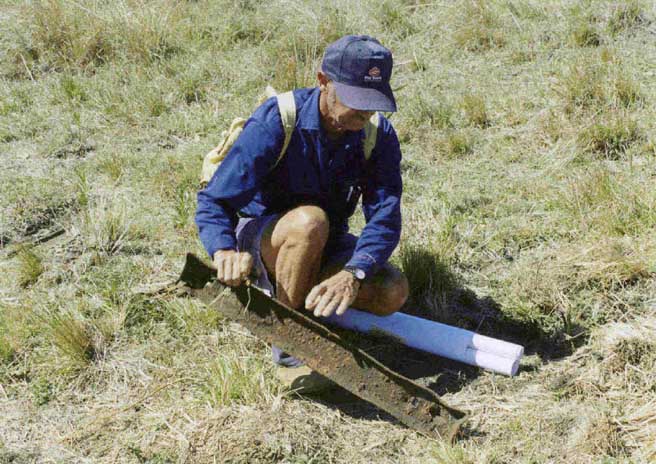
Photo 86: The drought reveals one of numerous metal sleepers (or spacers) and other fittings from portable track, still lying in position north of Kureelpa Falls Road. A second sleeper remains in situ at the left margin. (latitude 26° 36' 02.61" S, longitude 152° 54' 04.22" E).
After sugar cane ceased to be grown in this area, the farmers took up dairying and the land was used for grazing. For some unknown reason, this portable spur was simply abandoned when no longer required. One would have thought that the farmer would have lifted and sold the track for which there was a ready market, but in this case it was left where it was. Over the years the rails and clamps rusted and came adrift from the steel sleepers or spacers. Slashing equipment knocked many loose. At some point the owner decided that the sharp steel pieces of rail were dangerous to his cattle, and they were thrown into a nearby gully or stacked along fence lines. Some are still there
(latitude 26° 35' 56.40" S, longitude 152° 54' 06.06" E).
Many of the steel sleepers are still in situ. Quite a few protrude from the ground
or are level with the surface, and can be followed using one's eyes alone, if the grass is short. High grass in the area
obscured these relics for many decades, but they were revealed by the 2004 drought.
Photo 87:
Trevor Robinson holds a rail from portable track, found at the edge of the northern
escarpment of Kureelpa, overlooking Poona Dam.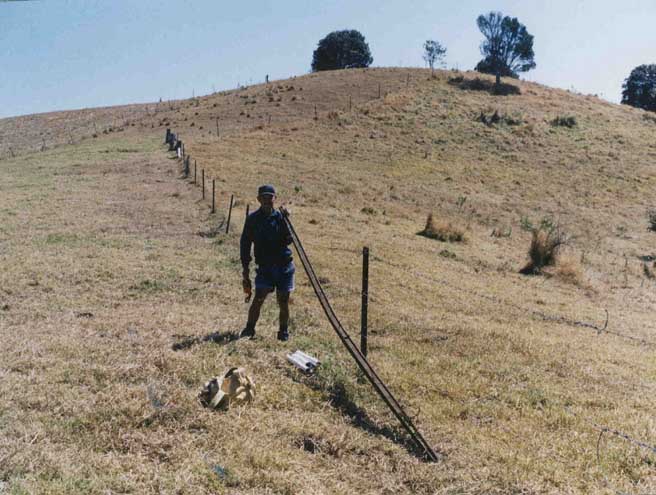
12.
1940 AERIAL PHOTOGRAPH OF THE AREA COVERED IN THE ABOVE MAP
This branchline is all on private land, but it can be clearly seen from public roads, as the photographs show. It ran south from the Kureelpa Hall to Dulong Road. It left the main line and crossed the Mapleton Road, heading south-west to a dead-end, now obliterated by the road's re-alignment. From the dead-end it crossed the nearby creek near the south-west corner of the Blackall Range Independent School reserve (formerly the Kureelpa State School). There was a bridge here, and the abutments are still visible.
The route then heads south-east, climbing around the northern end of a low ridge. Recently the alignment has been turned into a spoon drain. Many sleepers which had been buried were disturbed, and heaped up. A very well-preserved box culvert made out of sawn planks was seen near the bridge, but it may be gone now. The formation then turns south, climbing along the eastern side of a low ridge. The casual observer may think it is a farmer's road, but closer examination reveals it to be a tramway roadbed. The formation is clearly seen from the Mapleton Road as one travels between the Dulong Lookout turn-off and the Kureelpa Hall.
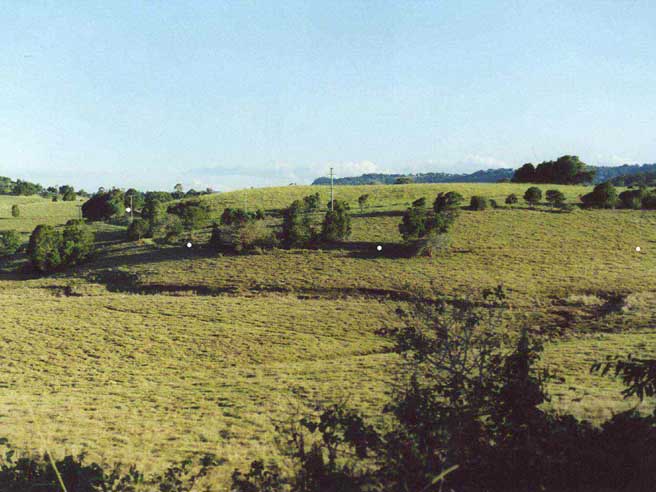
Photo 88: The Kureelpa end of the Dulong Branch, as seen from the Mapleton Road.
(Latitude 26° 37' 14.94" S, longitude 152° 54' 10.06" E).
1940 AERIAL PHOTOGRAPH OF THE NORTH SECTION OF THE DULONG BRANCH
The line passes through some trees and then bears to the right through a cutting to the western side of the ridge, bearing to the left so that it is heading south once more. It is now out of sight from the Mapleton Road, but can be well seen from the northern end of Talana Drive. From this point the Dulong branch can be seen approaching from the north, with material removed from cuttings being used to build adjoining embankments.
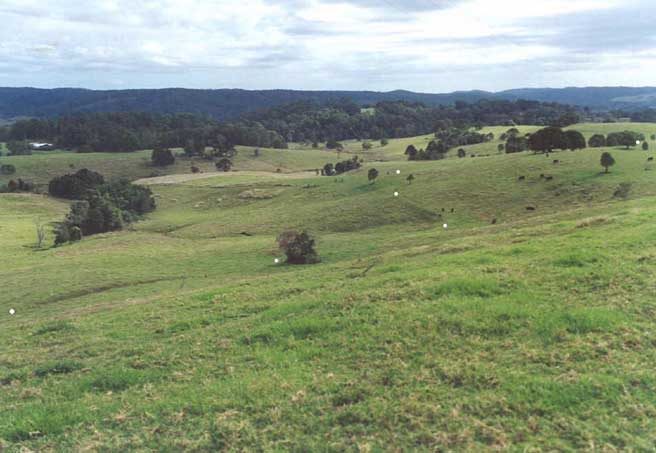
Photo 89: The Dulong Branch as seen from the end of Talana Drive.
(Latitude 26° 37' 36.11" S, longitude 152° 54' 10.05" E).
The line then swings to the west and passes through cuttings and across embankments until it reaches Thrushs Road at the bottom of a steep section of that road. A gap in one of the embankments close to the road shows where a bridge once stood.
Photo 90: The Dulong Branch as seen from Thrushs Road, looking north-east.
(Latitude 26° 37' 37.03" S, longitude 152° 54' 10.52" E).
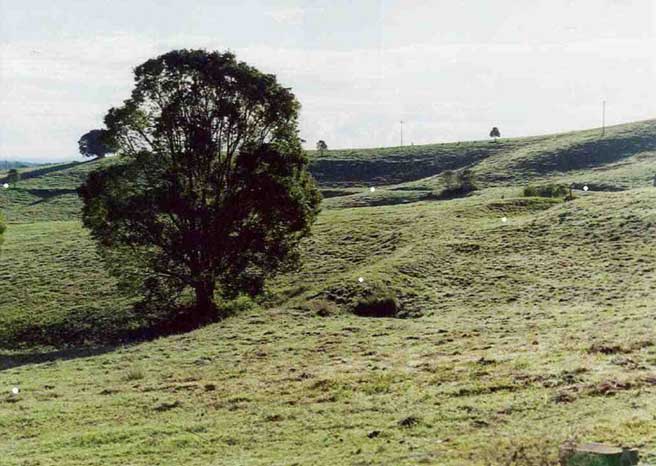
Photo 91: The Dulong Branch as seen from Thrushs Road, looking east-north-east over the site of a bridge.
(Latitude 26° 37' 44.22" S, longitude 152° 54' 04.65" E).
13. Pope's / Story's siding and spur
This section is still being researched.
Maps are based on or contain data provided by the Department of Natural Resources and Mines, Queensland 2005, and Maroochy Shire Council, Nambour, 2005, which give no warranty in relation to the data (including accuracy, reliability, completeness or suitability) and accept no liability (including without limitation, liability in negligence) for any loss, damage or costs (including consequential damage) relating to any use of the data.